We are delighted to announce that the brand new version 5.0 has been released officially, with all upgrades aimed at improving user experience.
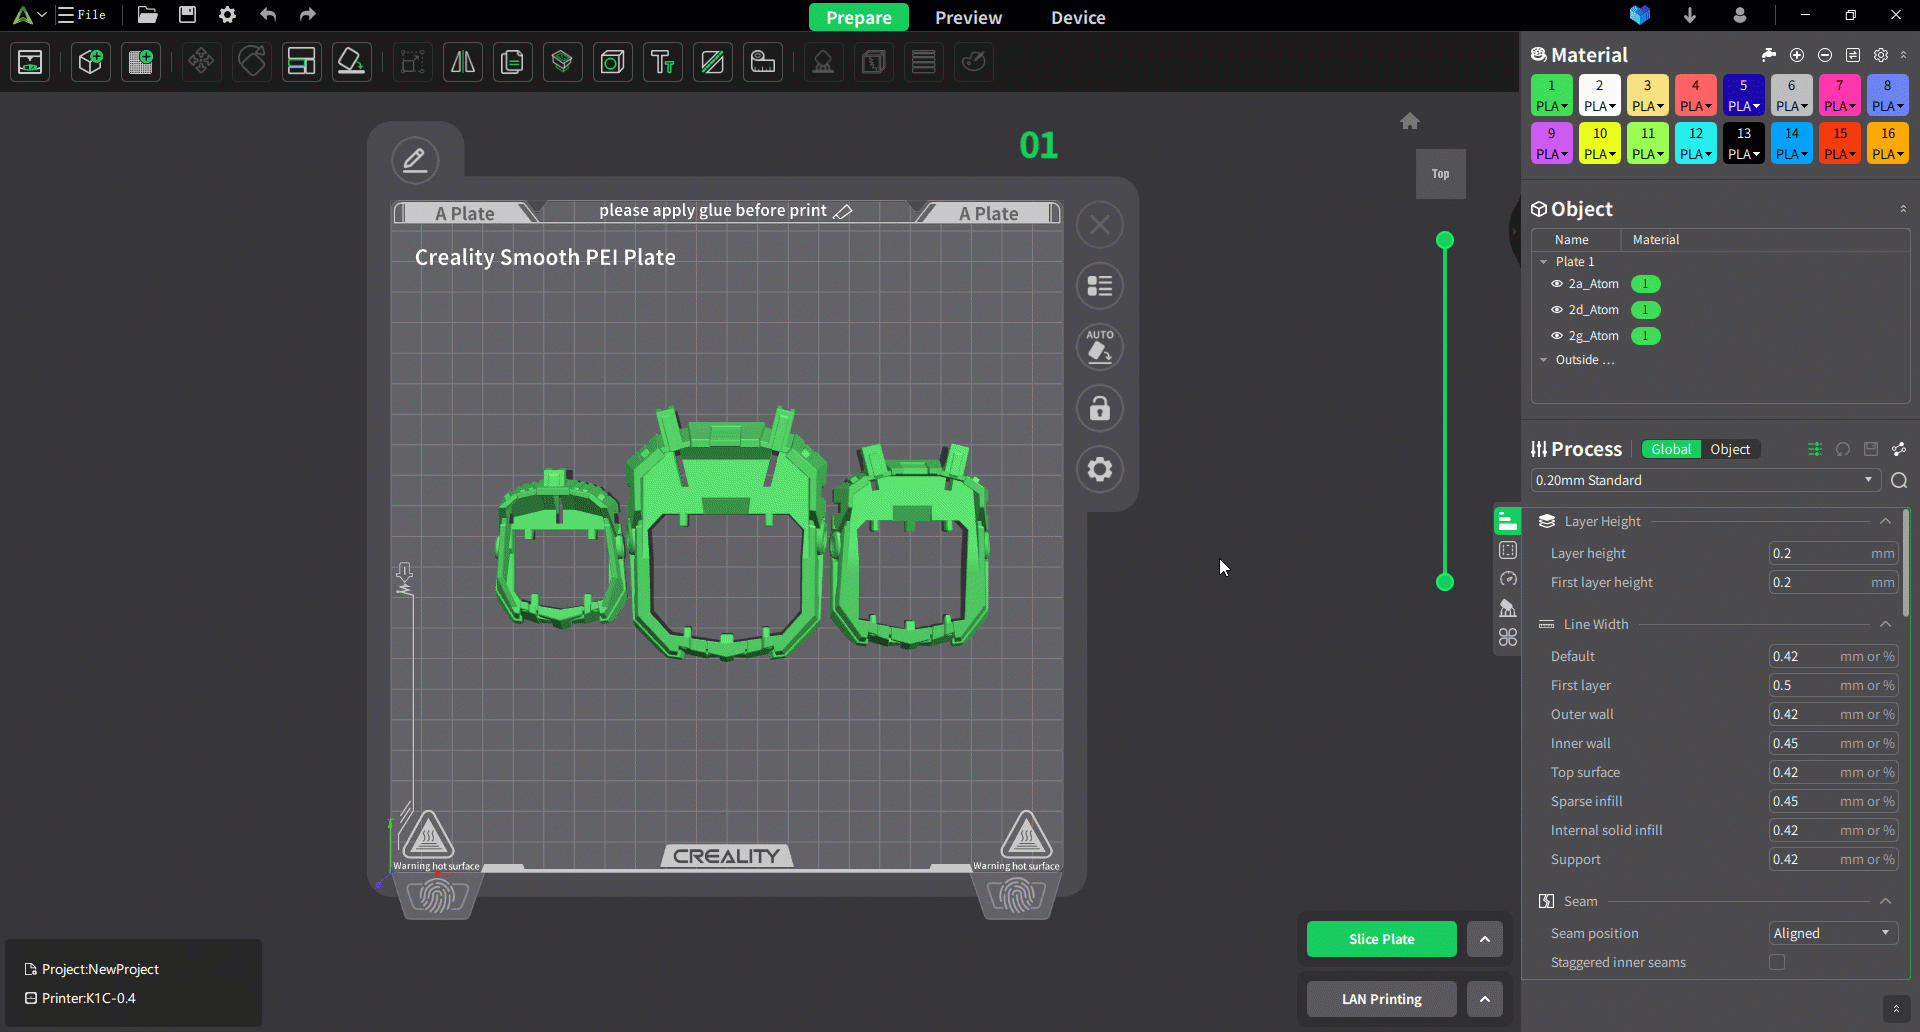
Firstly, with a new user interface and interaction experience, the process settings system has become simpler, and the slicer has become more user-friendly and intelligent. The K series/v3 high-speed machines now support 42 kinds of official filaments and general parameters. We have not only readjusted the machine process parameters, but all parameters can be saved and exported for sharing.
Moreover, through our ongoing efforts, version 5.0 has faster printing speed and better printing quality.Now let's see together what other surprises there.
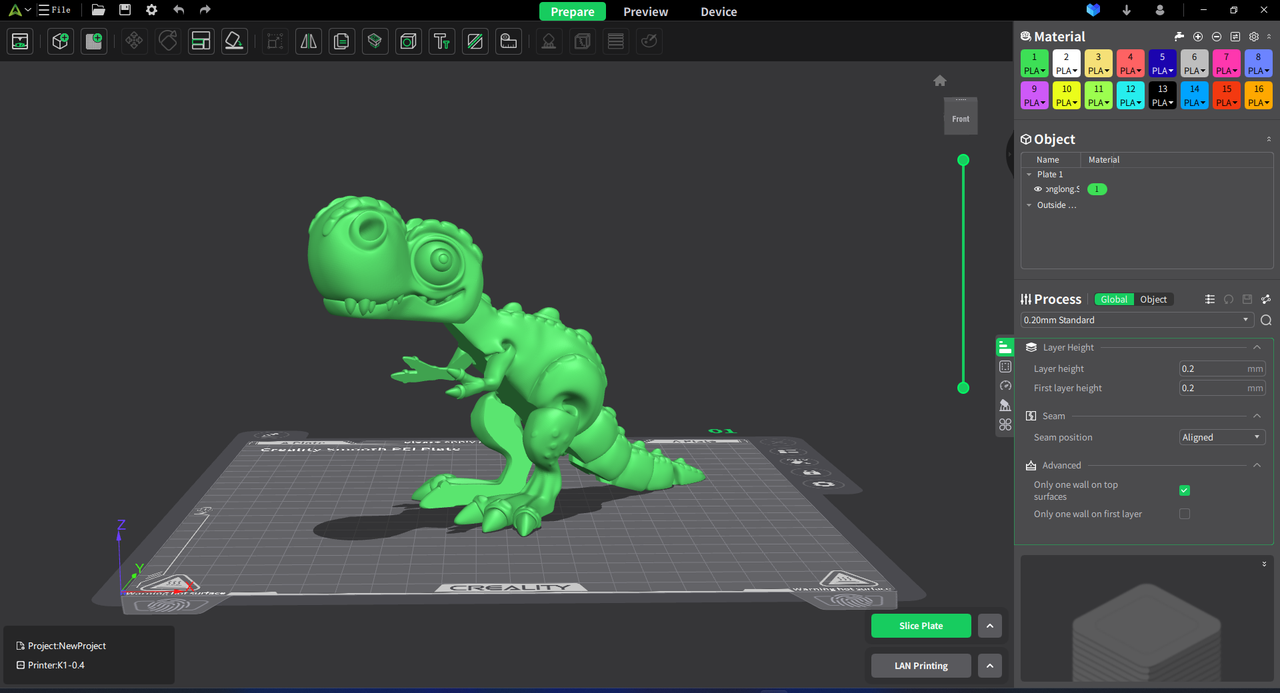
- With the upgrading of the company's Corporate Identity (VI) system to version 5.0, we have rolled out a fully revamped UI system. A brand-new logo, theme color, icons, and page layout will be introduced to provide users with a fresh visual experience.

- We adjusted the UI layout after the upgrade according to mainstream visual habits: we repositioned the toolbar and prioritized the process setting systems. This made the operation interface clearer, not only reducing the operation steps for settings, but also greatly enhancing the smoothness of the user experience.
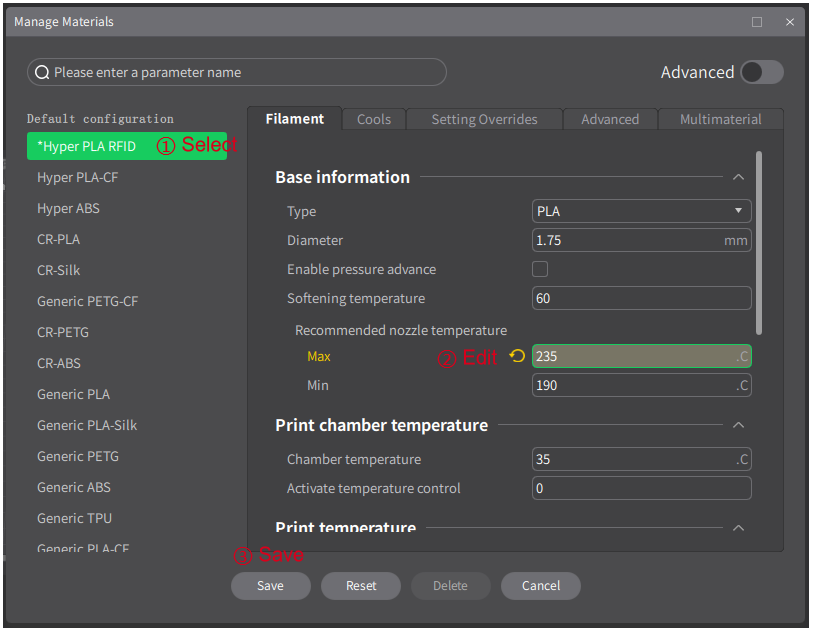
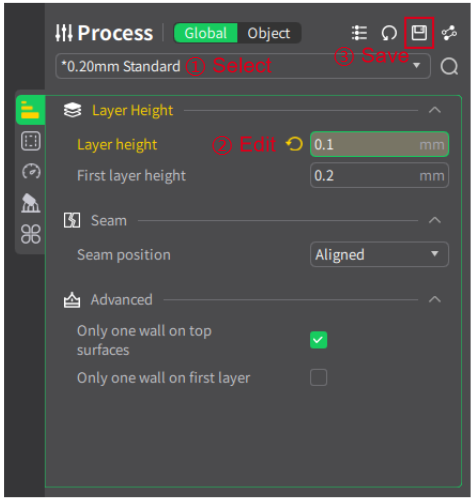
- After extensive model testing and parameter adjustment, we have developed several configurations for different machines and nozzle types. You can conveniently select an appropriate configuration for one-click printing. For instance, we offer four configurations for the K1C-0.4 nozzle.
- We constantly monitor the processing status of the model to minimize any factors that could negatively affect print quality. Should there be any issues, our user interface will promptly provide friendly cues in the bottom-left corner, assisting users in promptly identifying and resolving the issue to minimize any potential losses.
- The variety of settings often causes confusion. For this reason, we have selected a set of commonly used parameters as the basic settings, enabling you to quickly adjust common parameters and diminish the impact of unnecessary information.
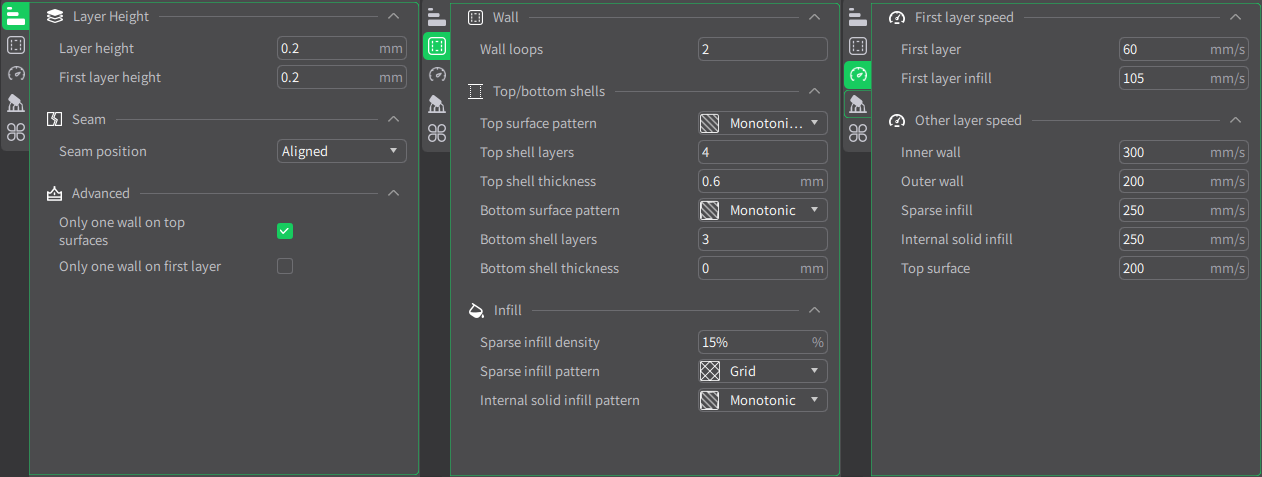
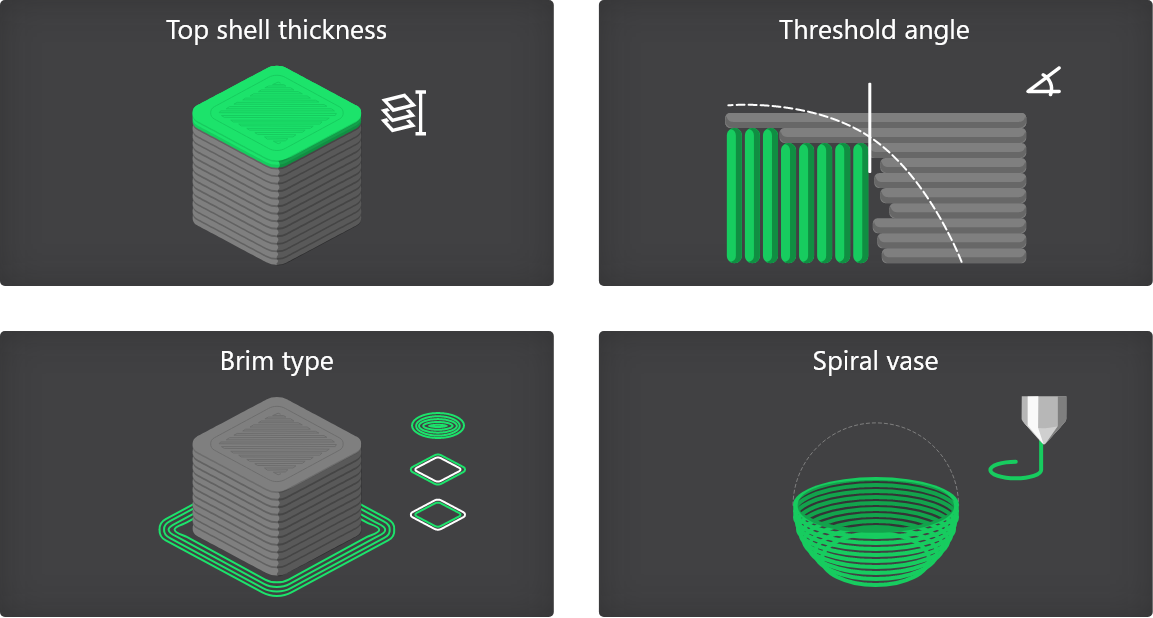
- 5.0 Version introduces a wealth of diagrams for parameters, illustrating complex parameters in an intuitive way. Along with these diagrams and elaborate descriptions, you can quickly understand the meaning of each parameter.
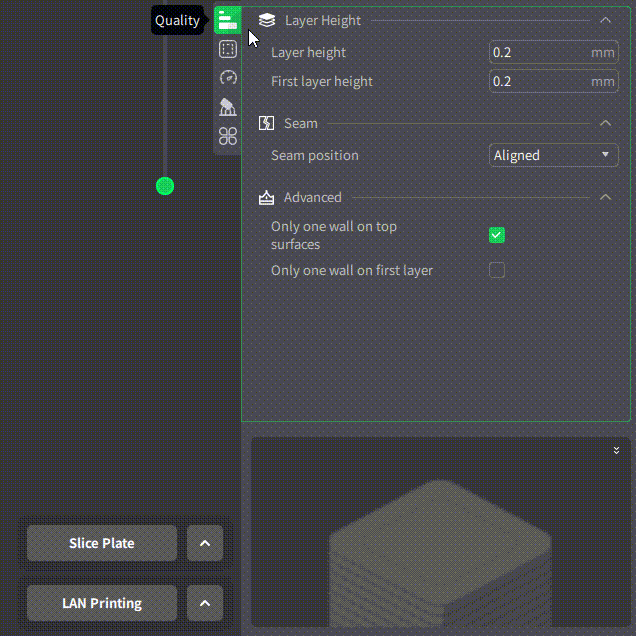
- Indeed, we also accommodate more extensive parameter configurations. Simply switch to the advanced settings mode to access comprehensive parameter information, facilitating broad and meticulous adjustment.
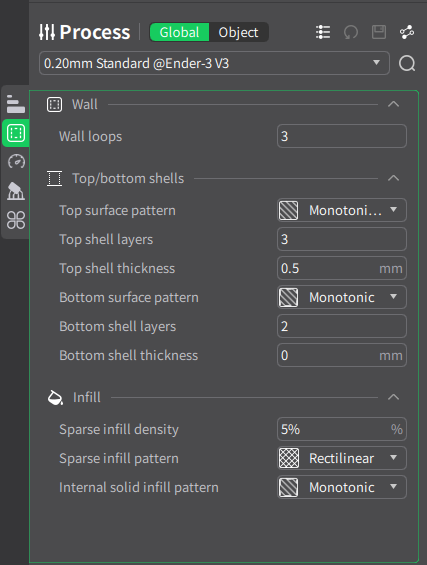
Normal
Advance
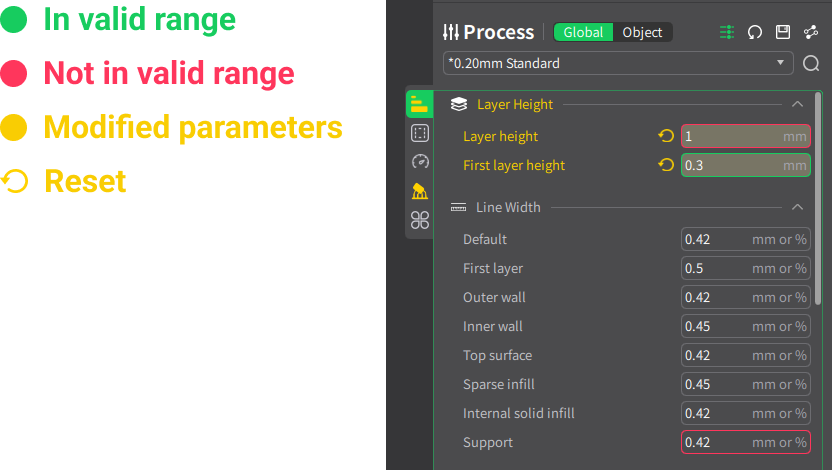
- Evidently, the valid range of parameters is closely associated with various factors such as the types of consumables and the device model. This often makes it challenging for users to accurately judge the validity of settings. To address this issue, we have established a suitable range for each parameter and provided a color-coded input box. This allows users to easily determine the status of parameters while making changes.
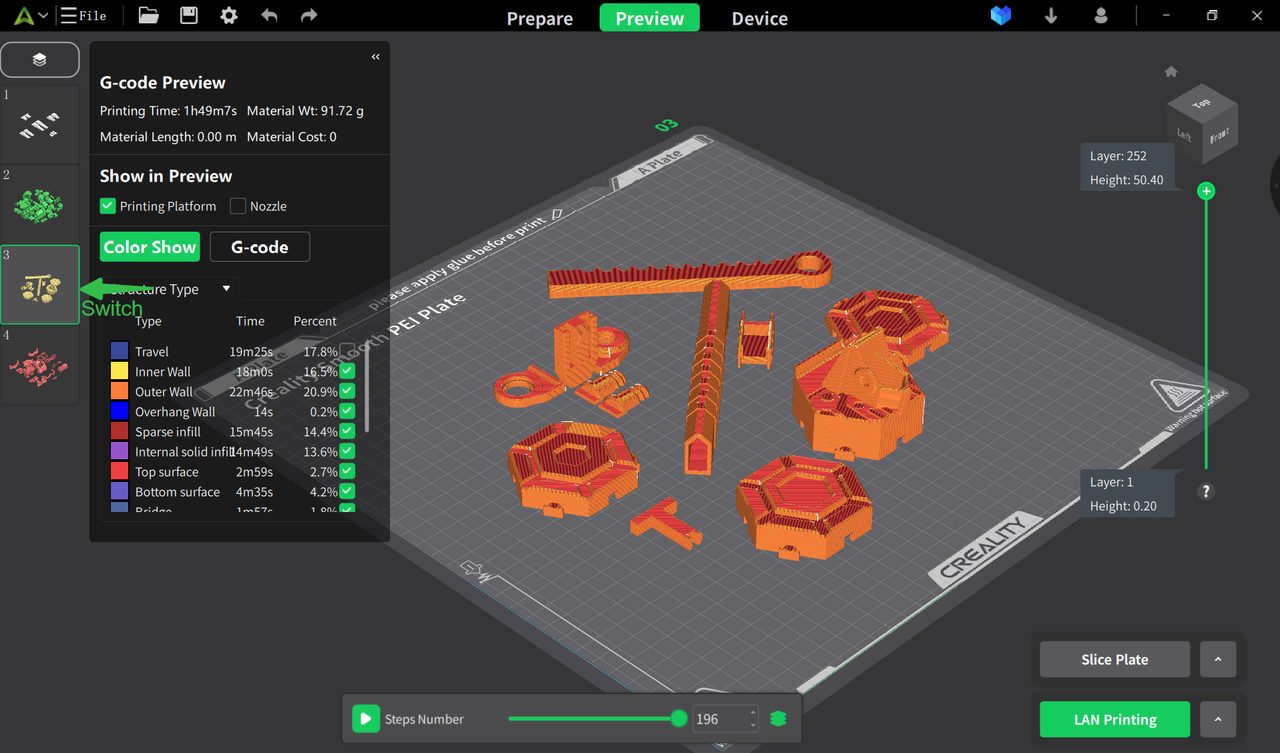
- Previewing slices has now become WYSIWYG - what you see is what you get. We now support real-time parameter modifications during previews, enabling you to rapidly observe the effects of your adjustments.

- We not only support global settings but also offer flexible and detailed solutions. When printing multiple models in the same job, you can use object settings to apply individual parameters to each model. Each model is sliced with the parameters that suit it best, effectively enhancing the print quality and efficiency.
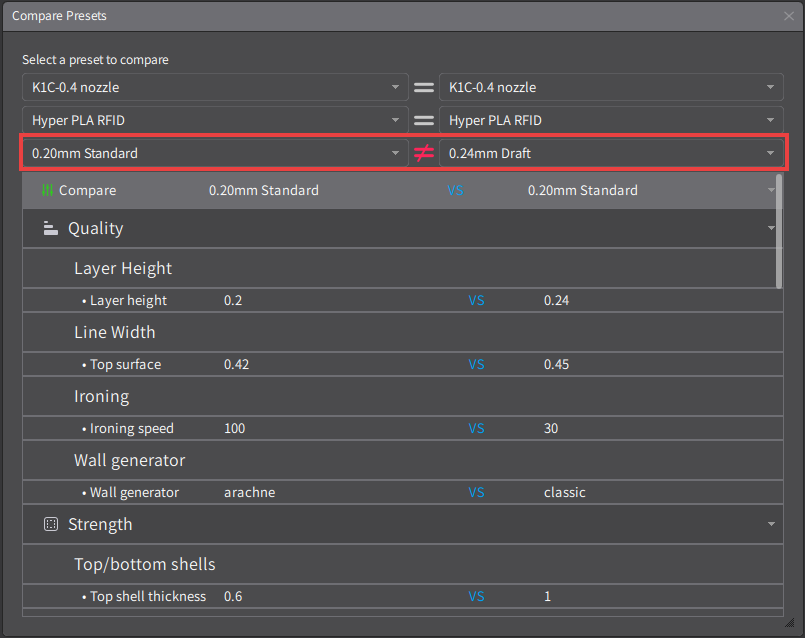
- Supports the comparison of different types of machines, materials, and process parameters. By using this feature, you can thoroughly compare the differences,to find out the key parameters affecting quality, providing guidance on the optimal direction for your printing tasks.
- Upgrade Of Default Parameter Configuration
Creality Print provides an array of tested and official print configurations, encompassing aspects like printers, filaments, and process settings. These configurations, verified through extensive testing, are designed to guarantee successful printing in the majority of cases, and simultaneously meet essential printing needs.
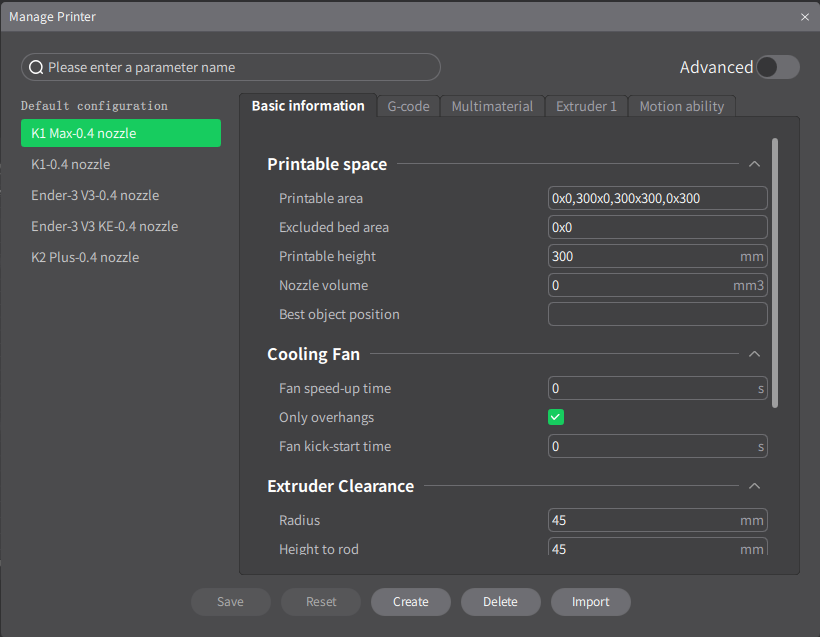
(Printer)
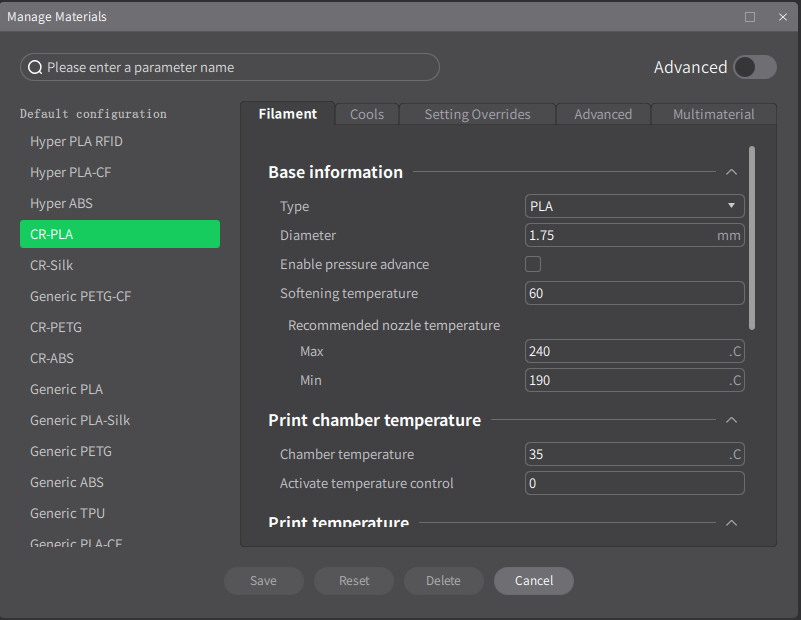
(Filament)
(Process)
A noteworthy update in the brand new 5.0 version is that we've upgraded and made great efforts to the printing configurations, with the aim of enhancing your printing experience. For instance, when printing the model in the following model on the same printer,using the default process settings of 0.2mm Standard process parameters, the print quality in version 5.0 is noticeably superior to that in version 4.3.8.
(5.0) (4.3.8)
(5.0) (4.3.8)
- Upgrade Of User Preset Configuration
Simplify your printing process by creating custom slicing parameter presets for regular use according to your distinct print demands and habits, such as settings for other filaments. You can base these on official configurations, and save them to Creality Print, or export them as a Zip for reuse or sharing with friends.
(Printer)
(Filament)
(Process)
The noteworthy aspect is the 5.0 version's compatibility with other slicer software exported user presets, such as Prusa and Orca. This allows for a variety of configurations from different software.
Furthermore, you can share and exchange your parameter configurations using 3mf project files. As a universal third-party standard file, 3mf offers richer and more accurate data descriptions compared to other formats. When using 3mf project files, not only printers, filaments, process settings, but also your databank for support coatings, Z-Seam drawing data, adaptive layer heights, etc., can be seamlessly used across multiple software platforms.
In the past, when printing splicing structural models, we had to manually group a large number of models on a print plate and store them in multiple files for printing. This process was somewhat cumbersome, prone to error, and very time-consuming. Now, with multi-plates management, you can consolidate all the parts need to be printed in one file to increase convenience and operation efficiency in classifying models, making it easy to handle the printing tasks of multiple models.
primary functions:
- Supports regular operations of the plate, such as adding/removing/selecting/customizing names/locking, etc.;
- Supports automatic layout and orientation of the current tray model, and you can also manually drag to adjust;
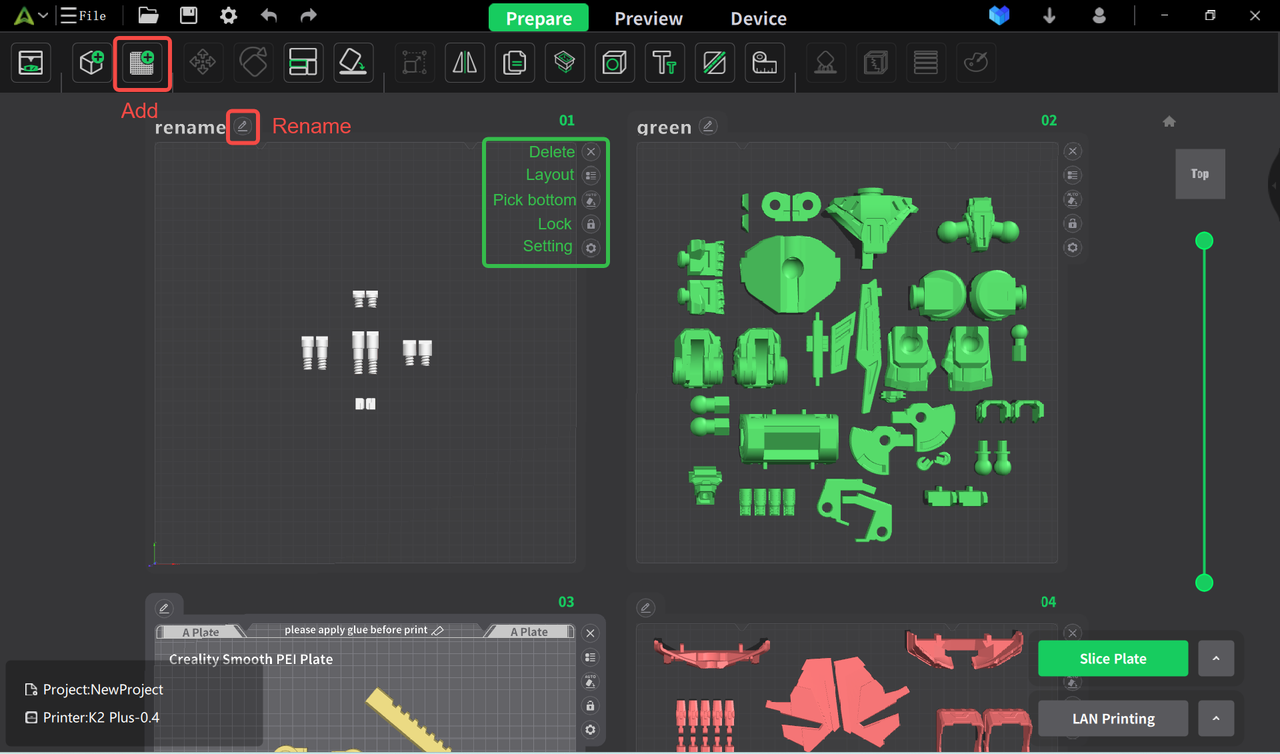
- Supports saving the plates to 3MF and CXPRJ files for easy subsequent editing;
- Supports quick switching between different trays to perform slicing, previewing, and printing.
The printing speed of the model is influenced by not only the hardware but also the slicing algorithm optimization. Thanks to algorithm improvements in version 5.0, a very apparent enhancement of printing speed, ranging potentially between 20% and 50%, though the exact percentage would vary based on model structure and printing process.
There are two key factors contributing to these speed improvements.
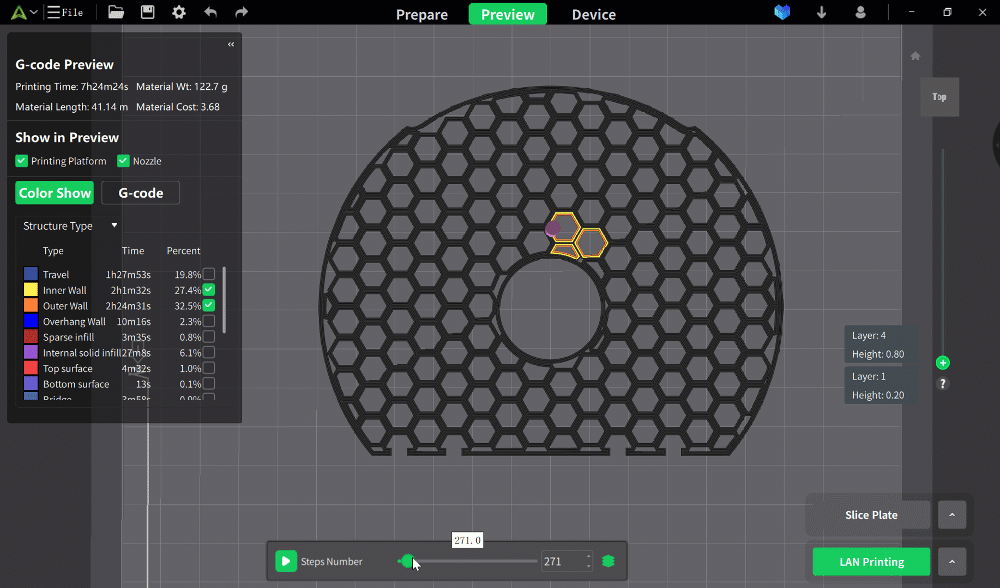
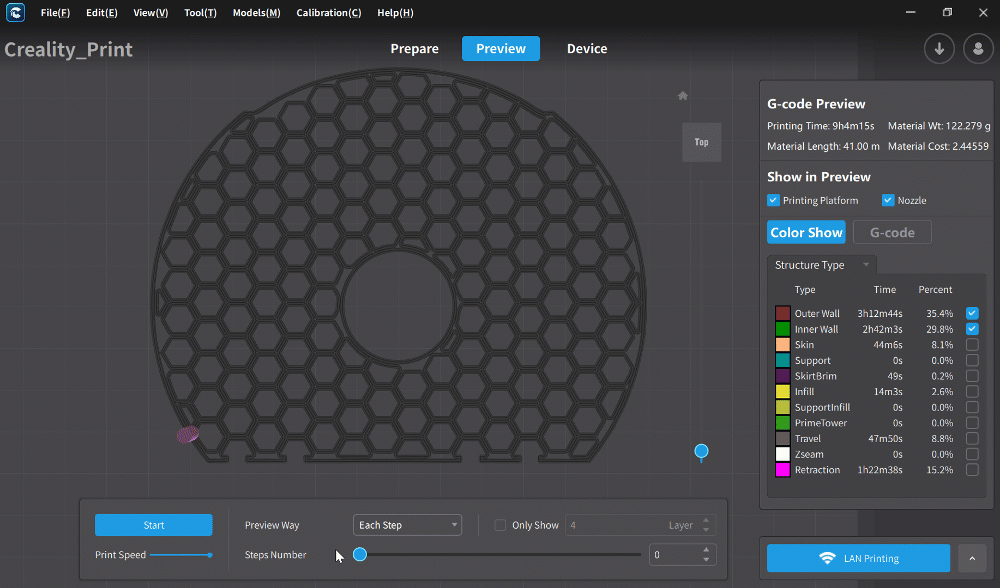
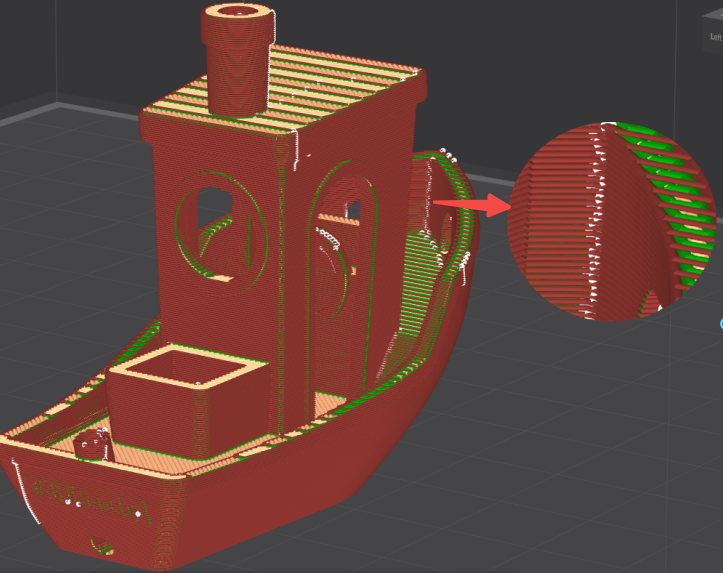
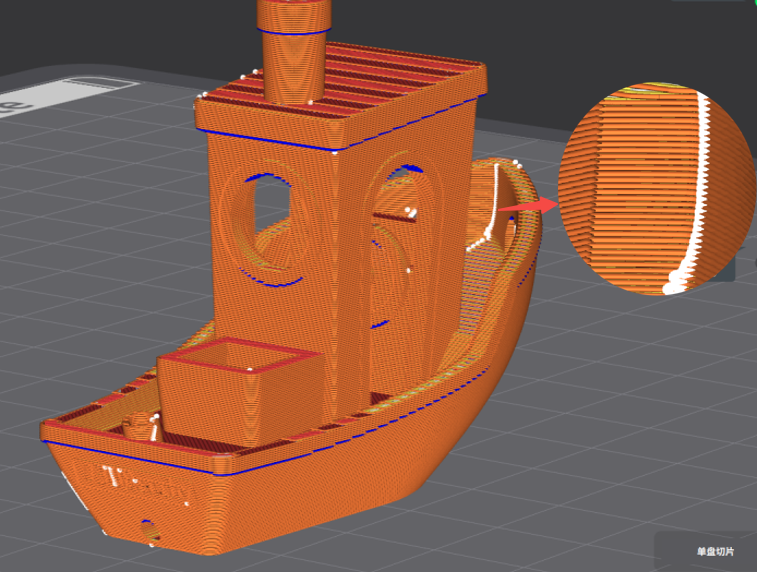
First, efforts have been made to greatly increase the speed of certain types of lines, specifically the inner and outer walls, while still ensuring printing quality. As the graphic shows below, version 5.0 presents a visibly higher speed (indicated by color) for the lines of the inner and outer walls on each level compared with the previous versions.

(Printing Time of 5.0:7h 24m 24s)
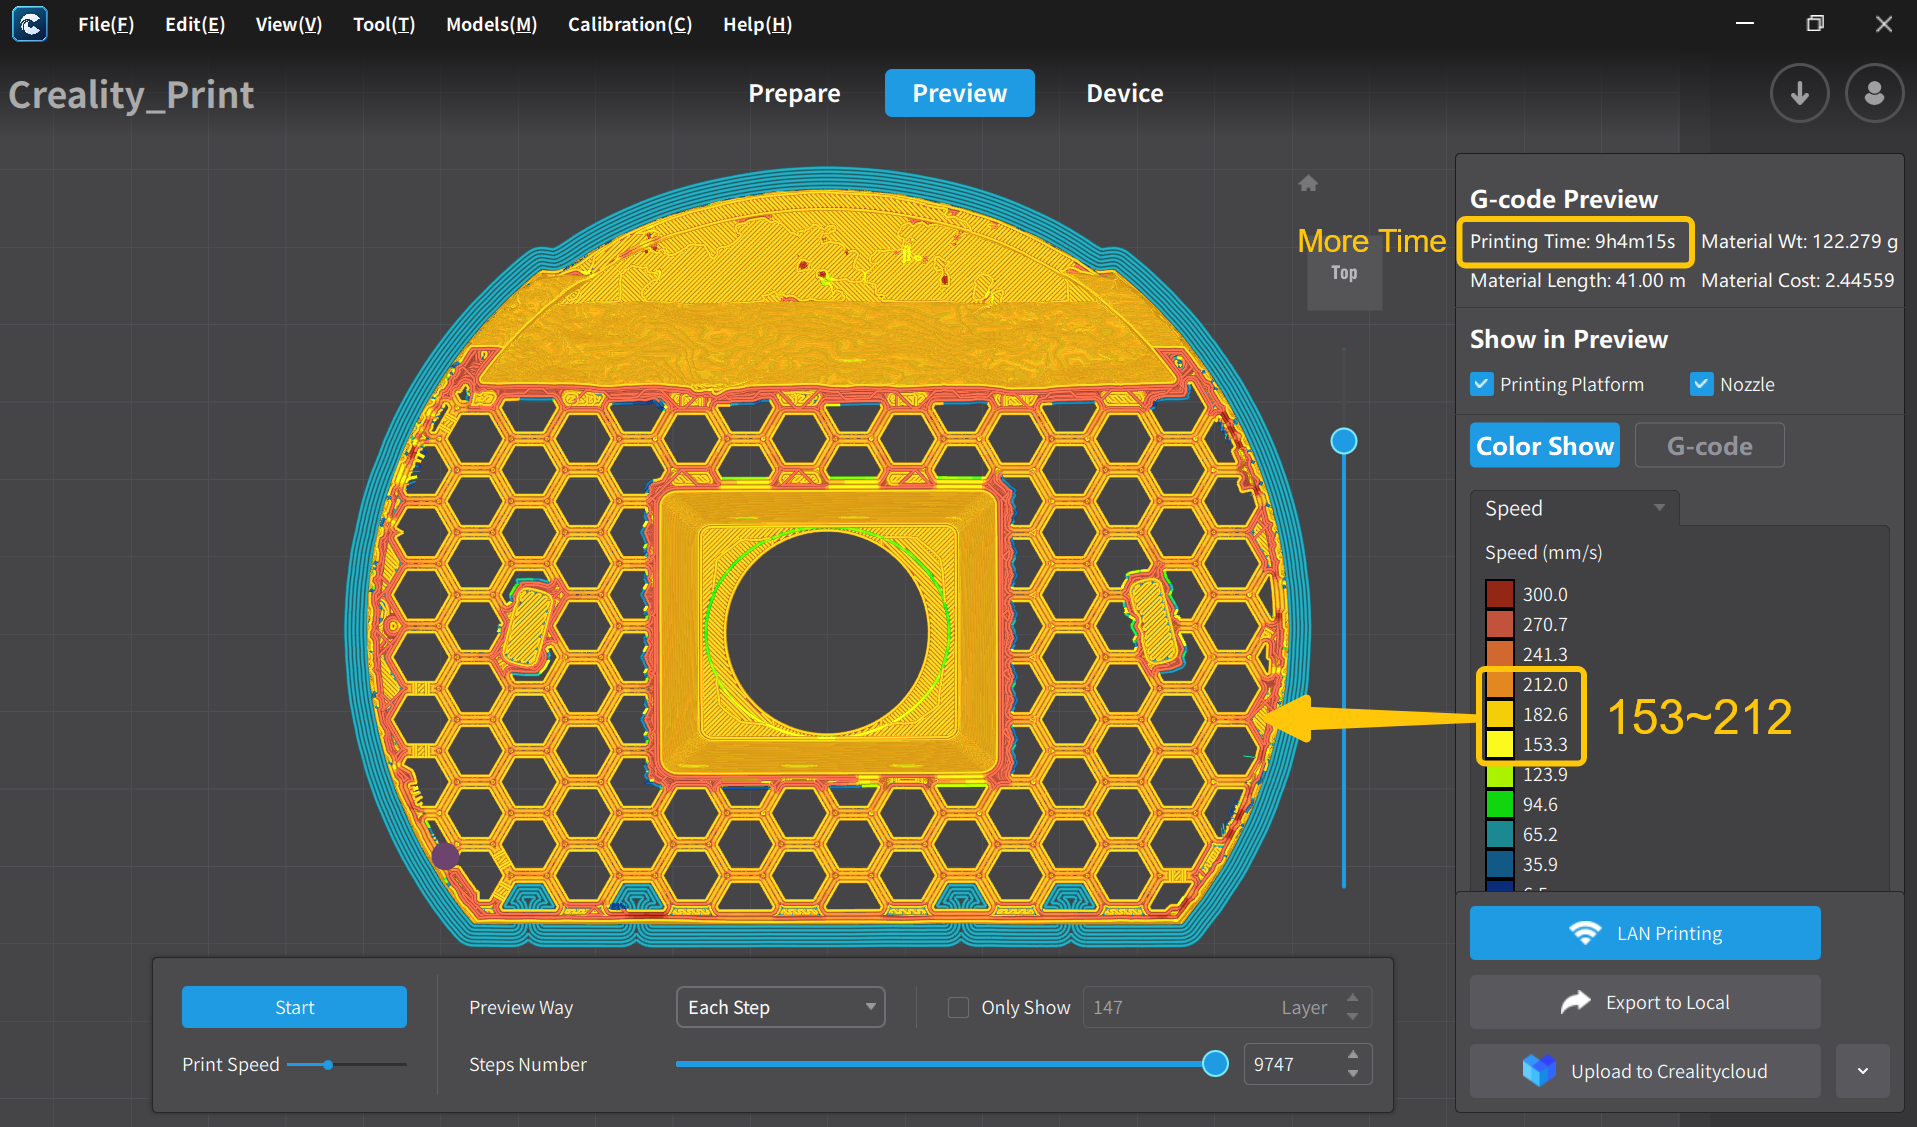
(Printing Time of 4.3.8:9h 4m 15s)
Next, we have improved the continuity of 3D-printing paths and attempted to follow the shortest routes in the printings. Below you will see the printing pathways of both the old and new versions in the same layer. You may intuitively find that the path planning in the newer version has become considerably more efficient.
(5.0)
(4.3.8)
Not only that, we've optimized the slicing algorithm from a software engineering standpoint. Specifically, we have decoupled the geometric handling and process computations within the algorithm and leveraged multi-core parallel processing. This enables geometric handling and process calculations to occur concurrently, thereby greatly enhancing slicing efficiency.
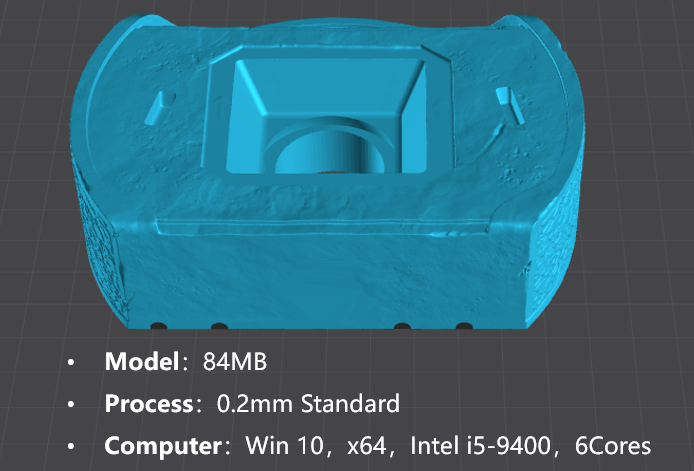
The extent to which slicing efficiency improves depends on your computer settings and the magnitude of the model. For instance, as per the displayed model, it only takes a quarter of the previous slicing duration, so no more waiting for long periods!
Indeed, in terms of print quality, which everyone cares about most, version 5.0 has demonstrated significant improvements, particularly in the aspects of 'overhang', 'Z-seam', and 'support'.Among them, 'Z-seam' and 'support' stand out.
These advancements originate from our comprehensive technical innovations, with the optimization of our path planning algorithm being a paramount element. Simultaneously, we have also made more precise adjustments in parameter settings. When these two efforts work together, they improve the print quality of our models.
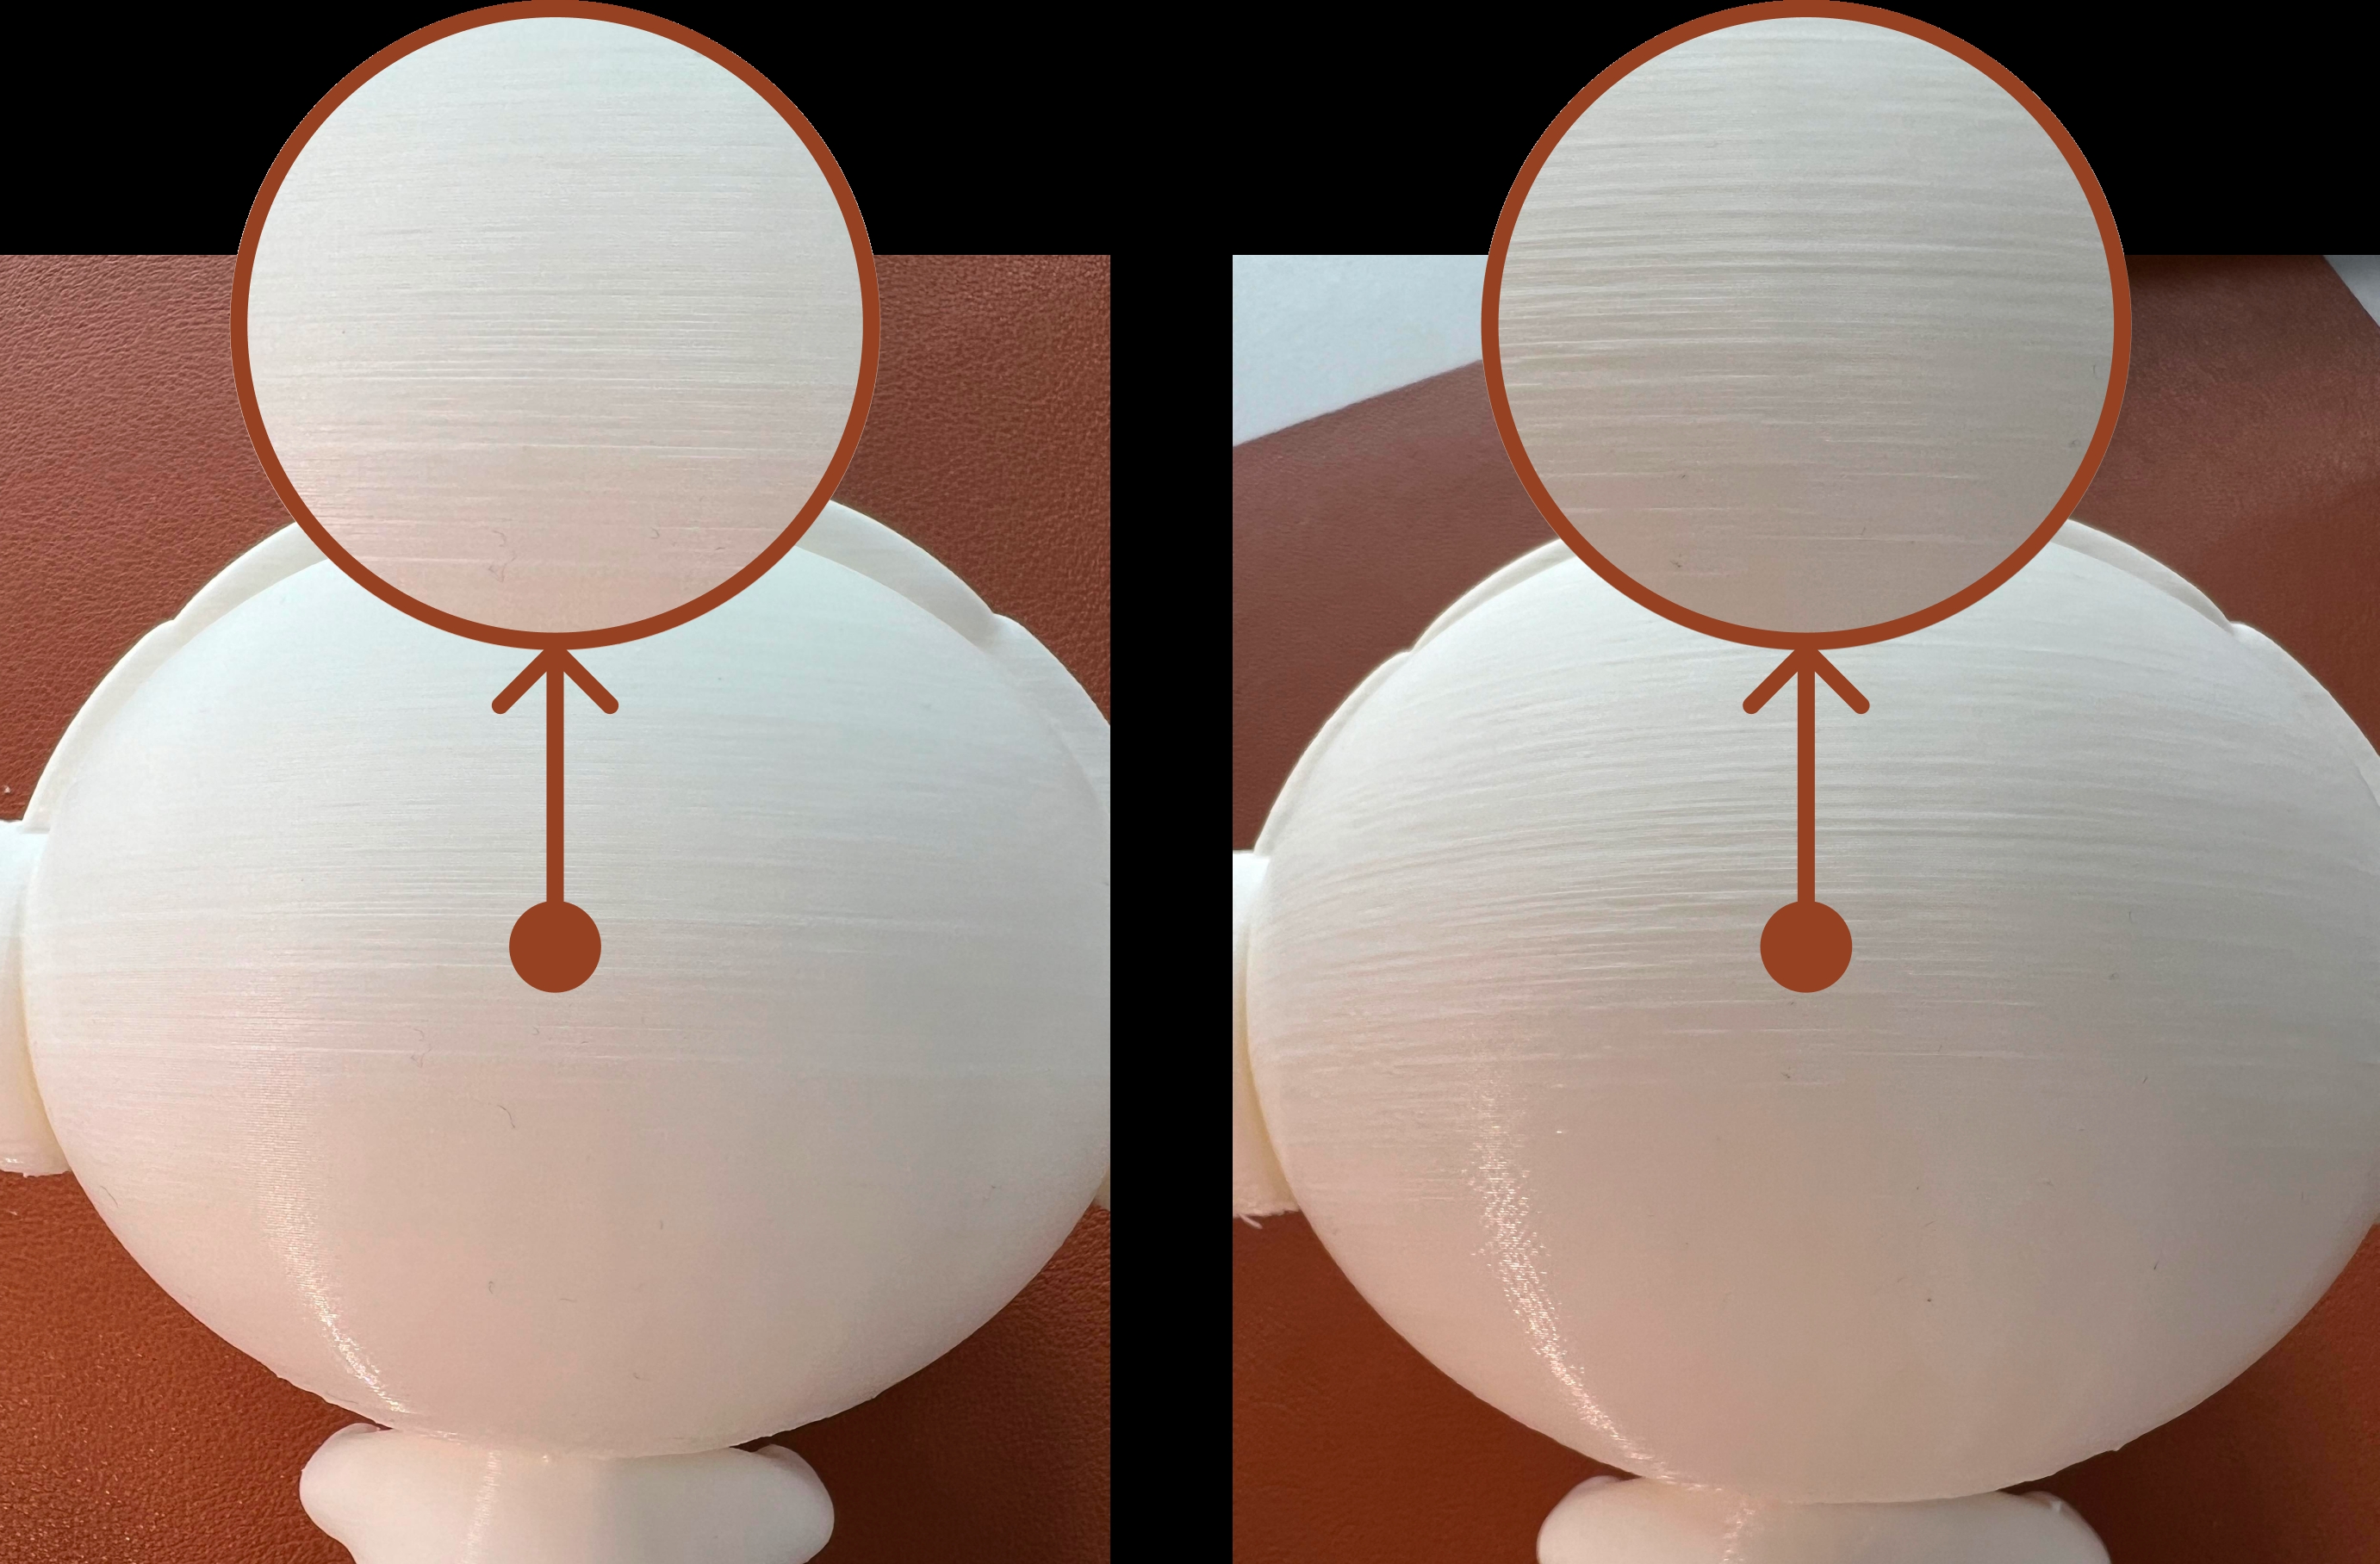
- Overhang: The outer wall becomes more delicate and smooth.
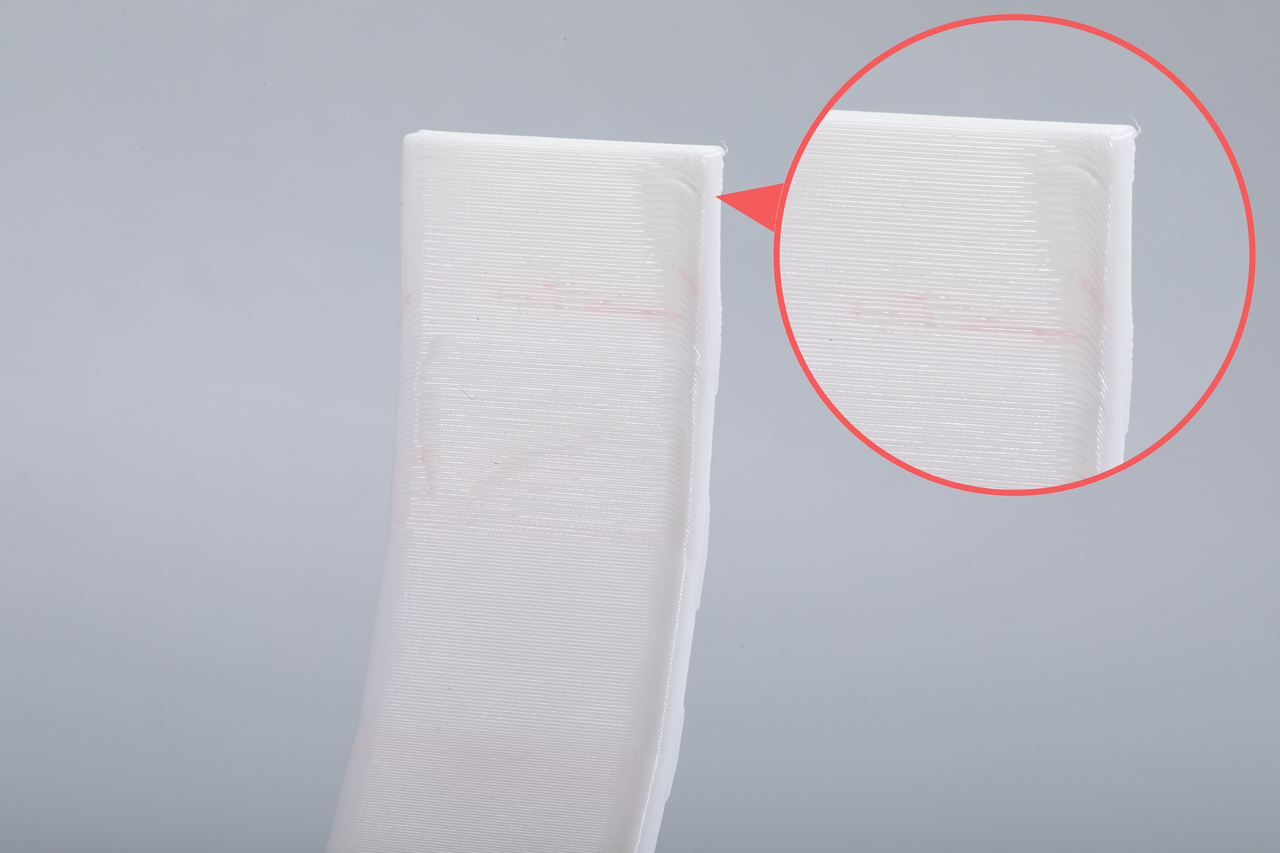
4.3.8
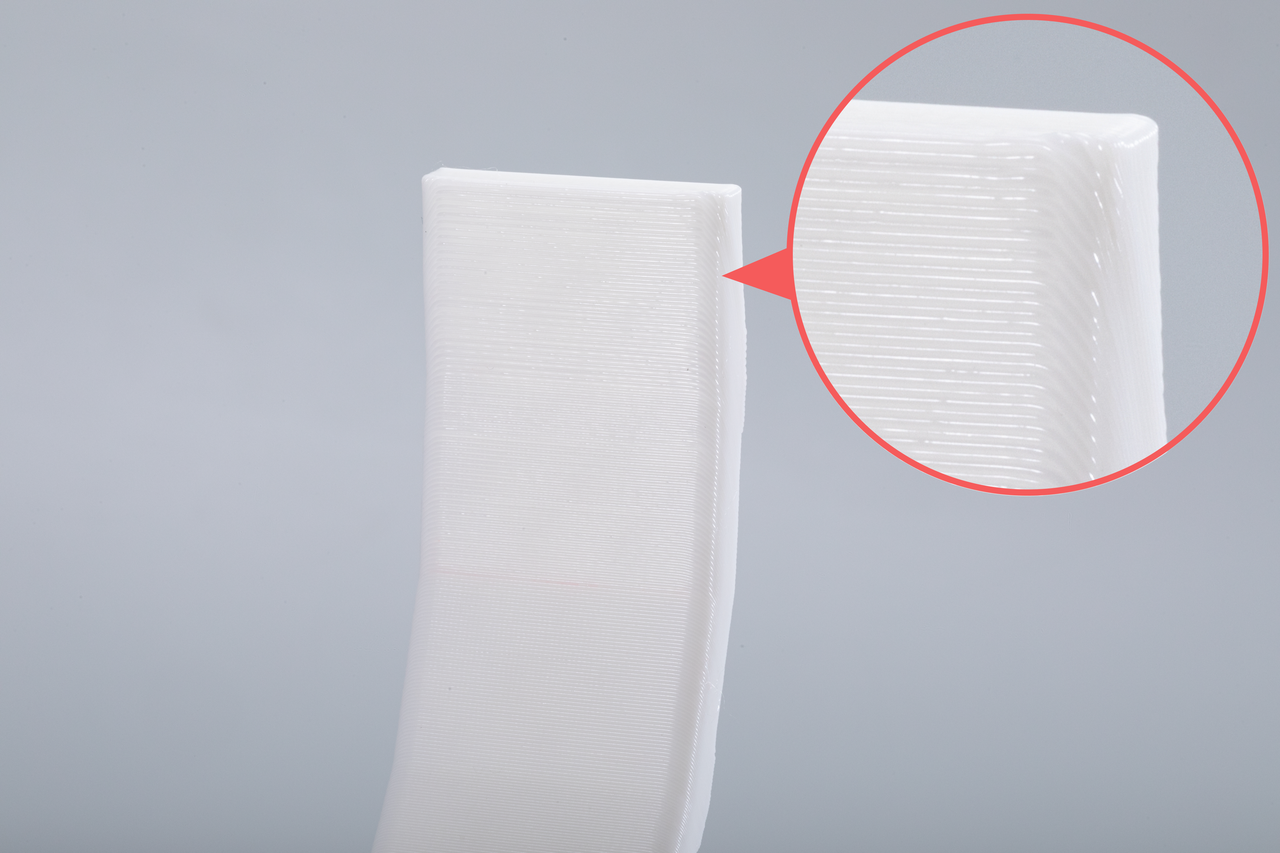
5.0
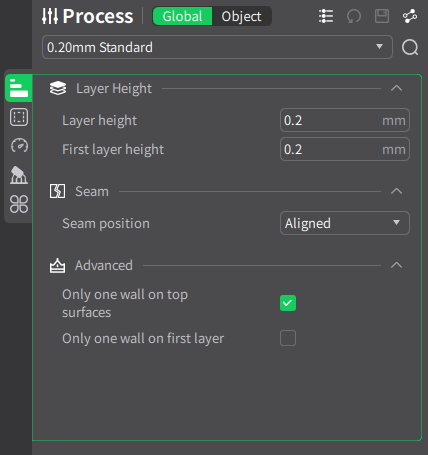
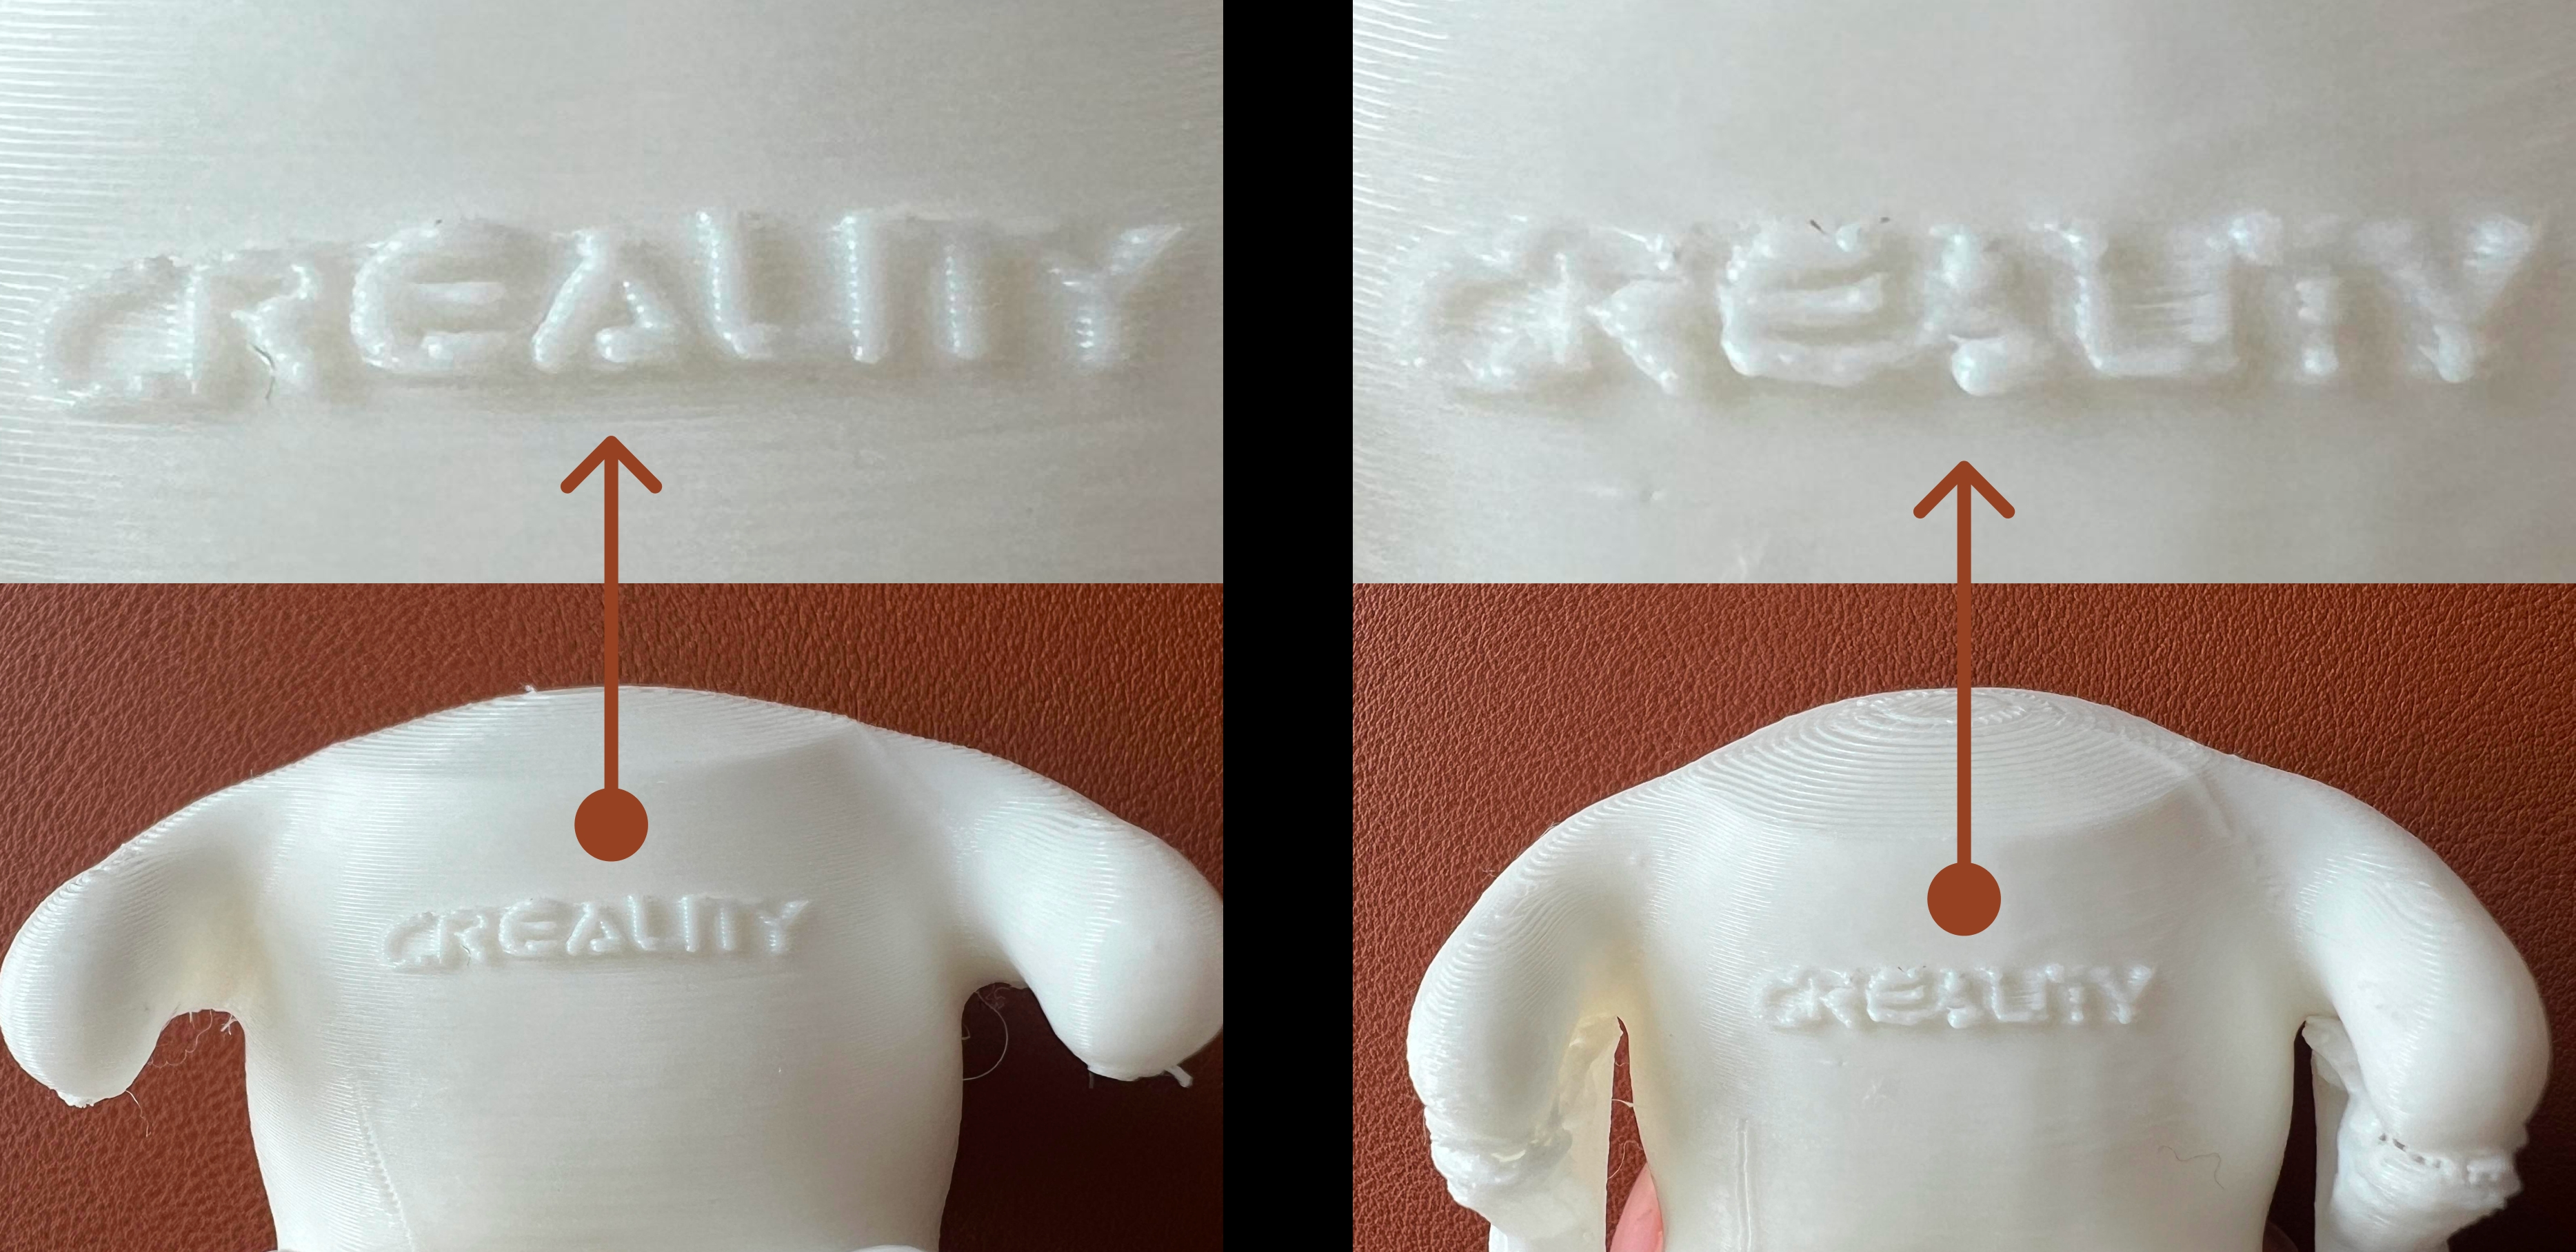
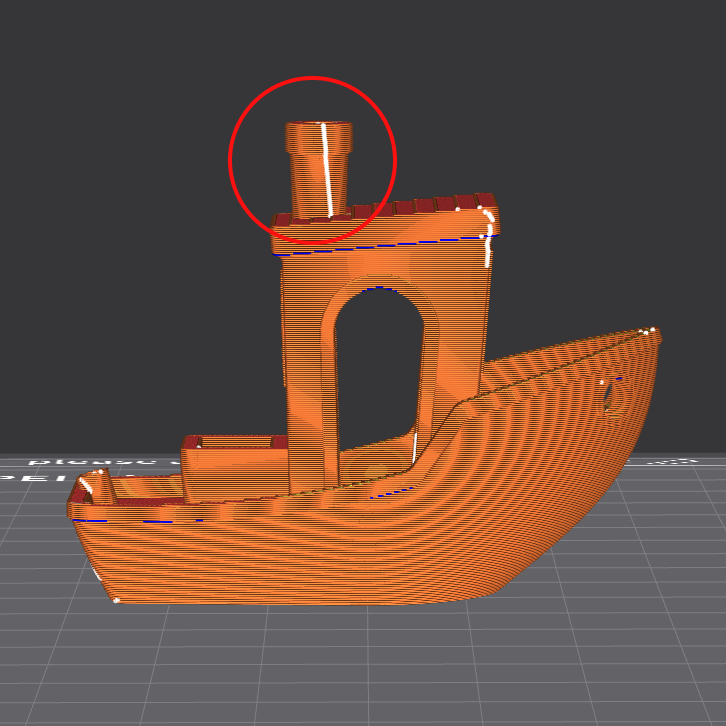
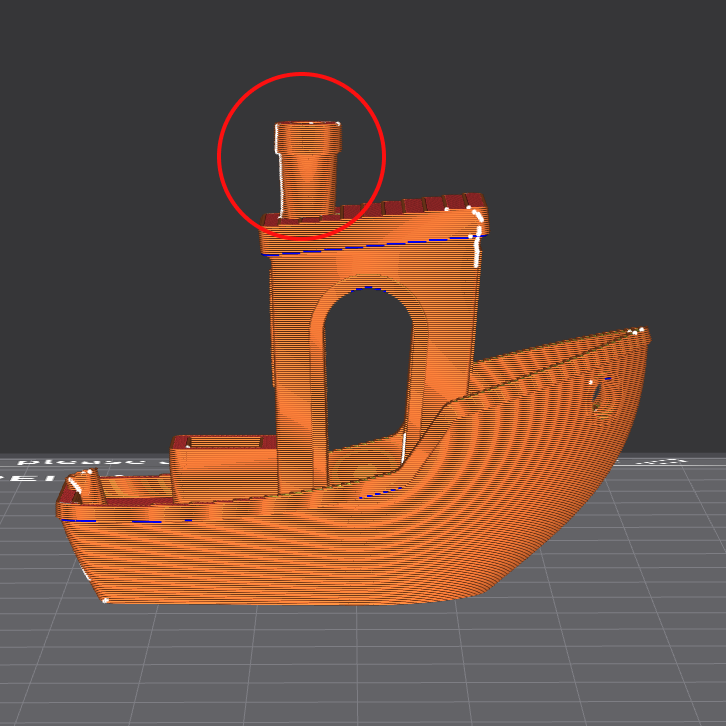
- Z Seam: Higher precision, richer styles, such as alignment, nearest, back, random. For example, the model in the following picture utilizes the alignment style.
4.3.8
5.0
- Support: The generation of support is more rational.
There are many aspects to optimizing support, among which the key is that we have achieved fewer supports and more effective contact surfaces, making the supports easier to remove and the contact surface less likely to collapse. This greatly improves the surface quality of the model while reducing printing time and materials used.
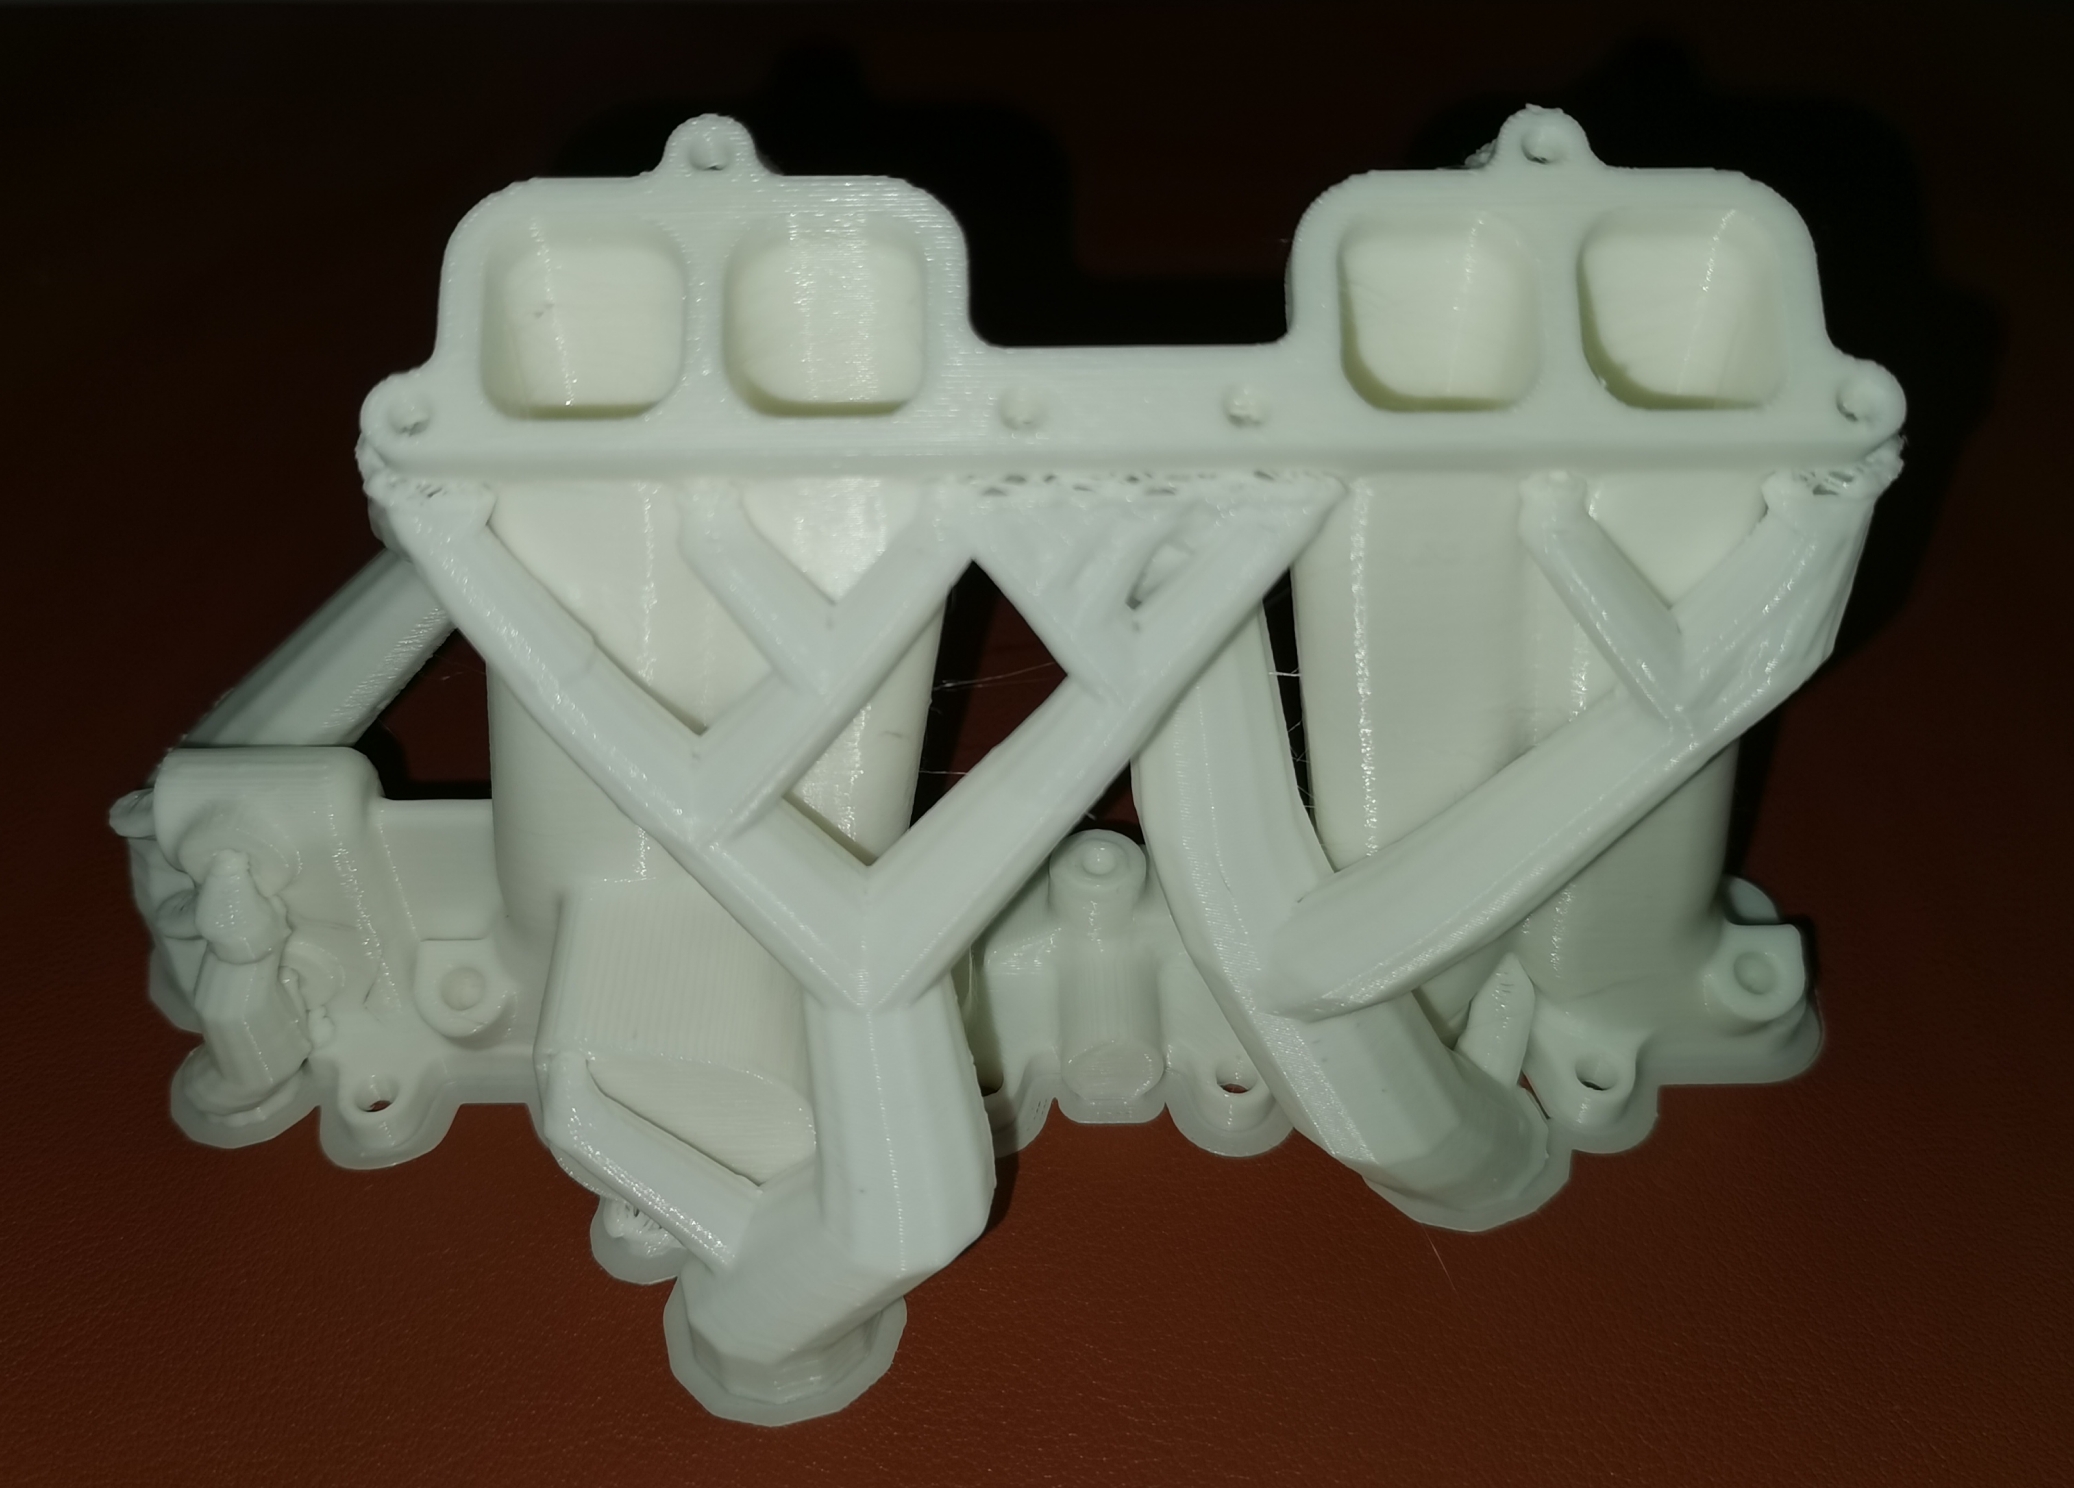
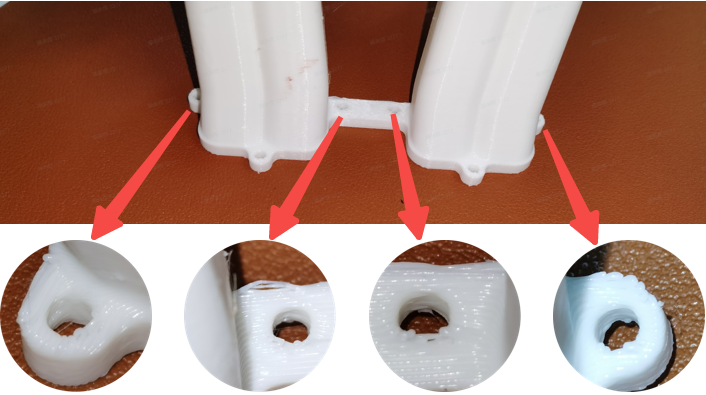
(4.3.8-Supporting Results and Print Quality)
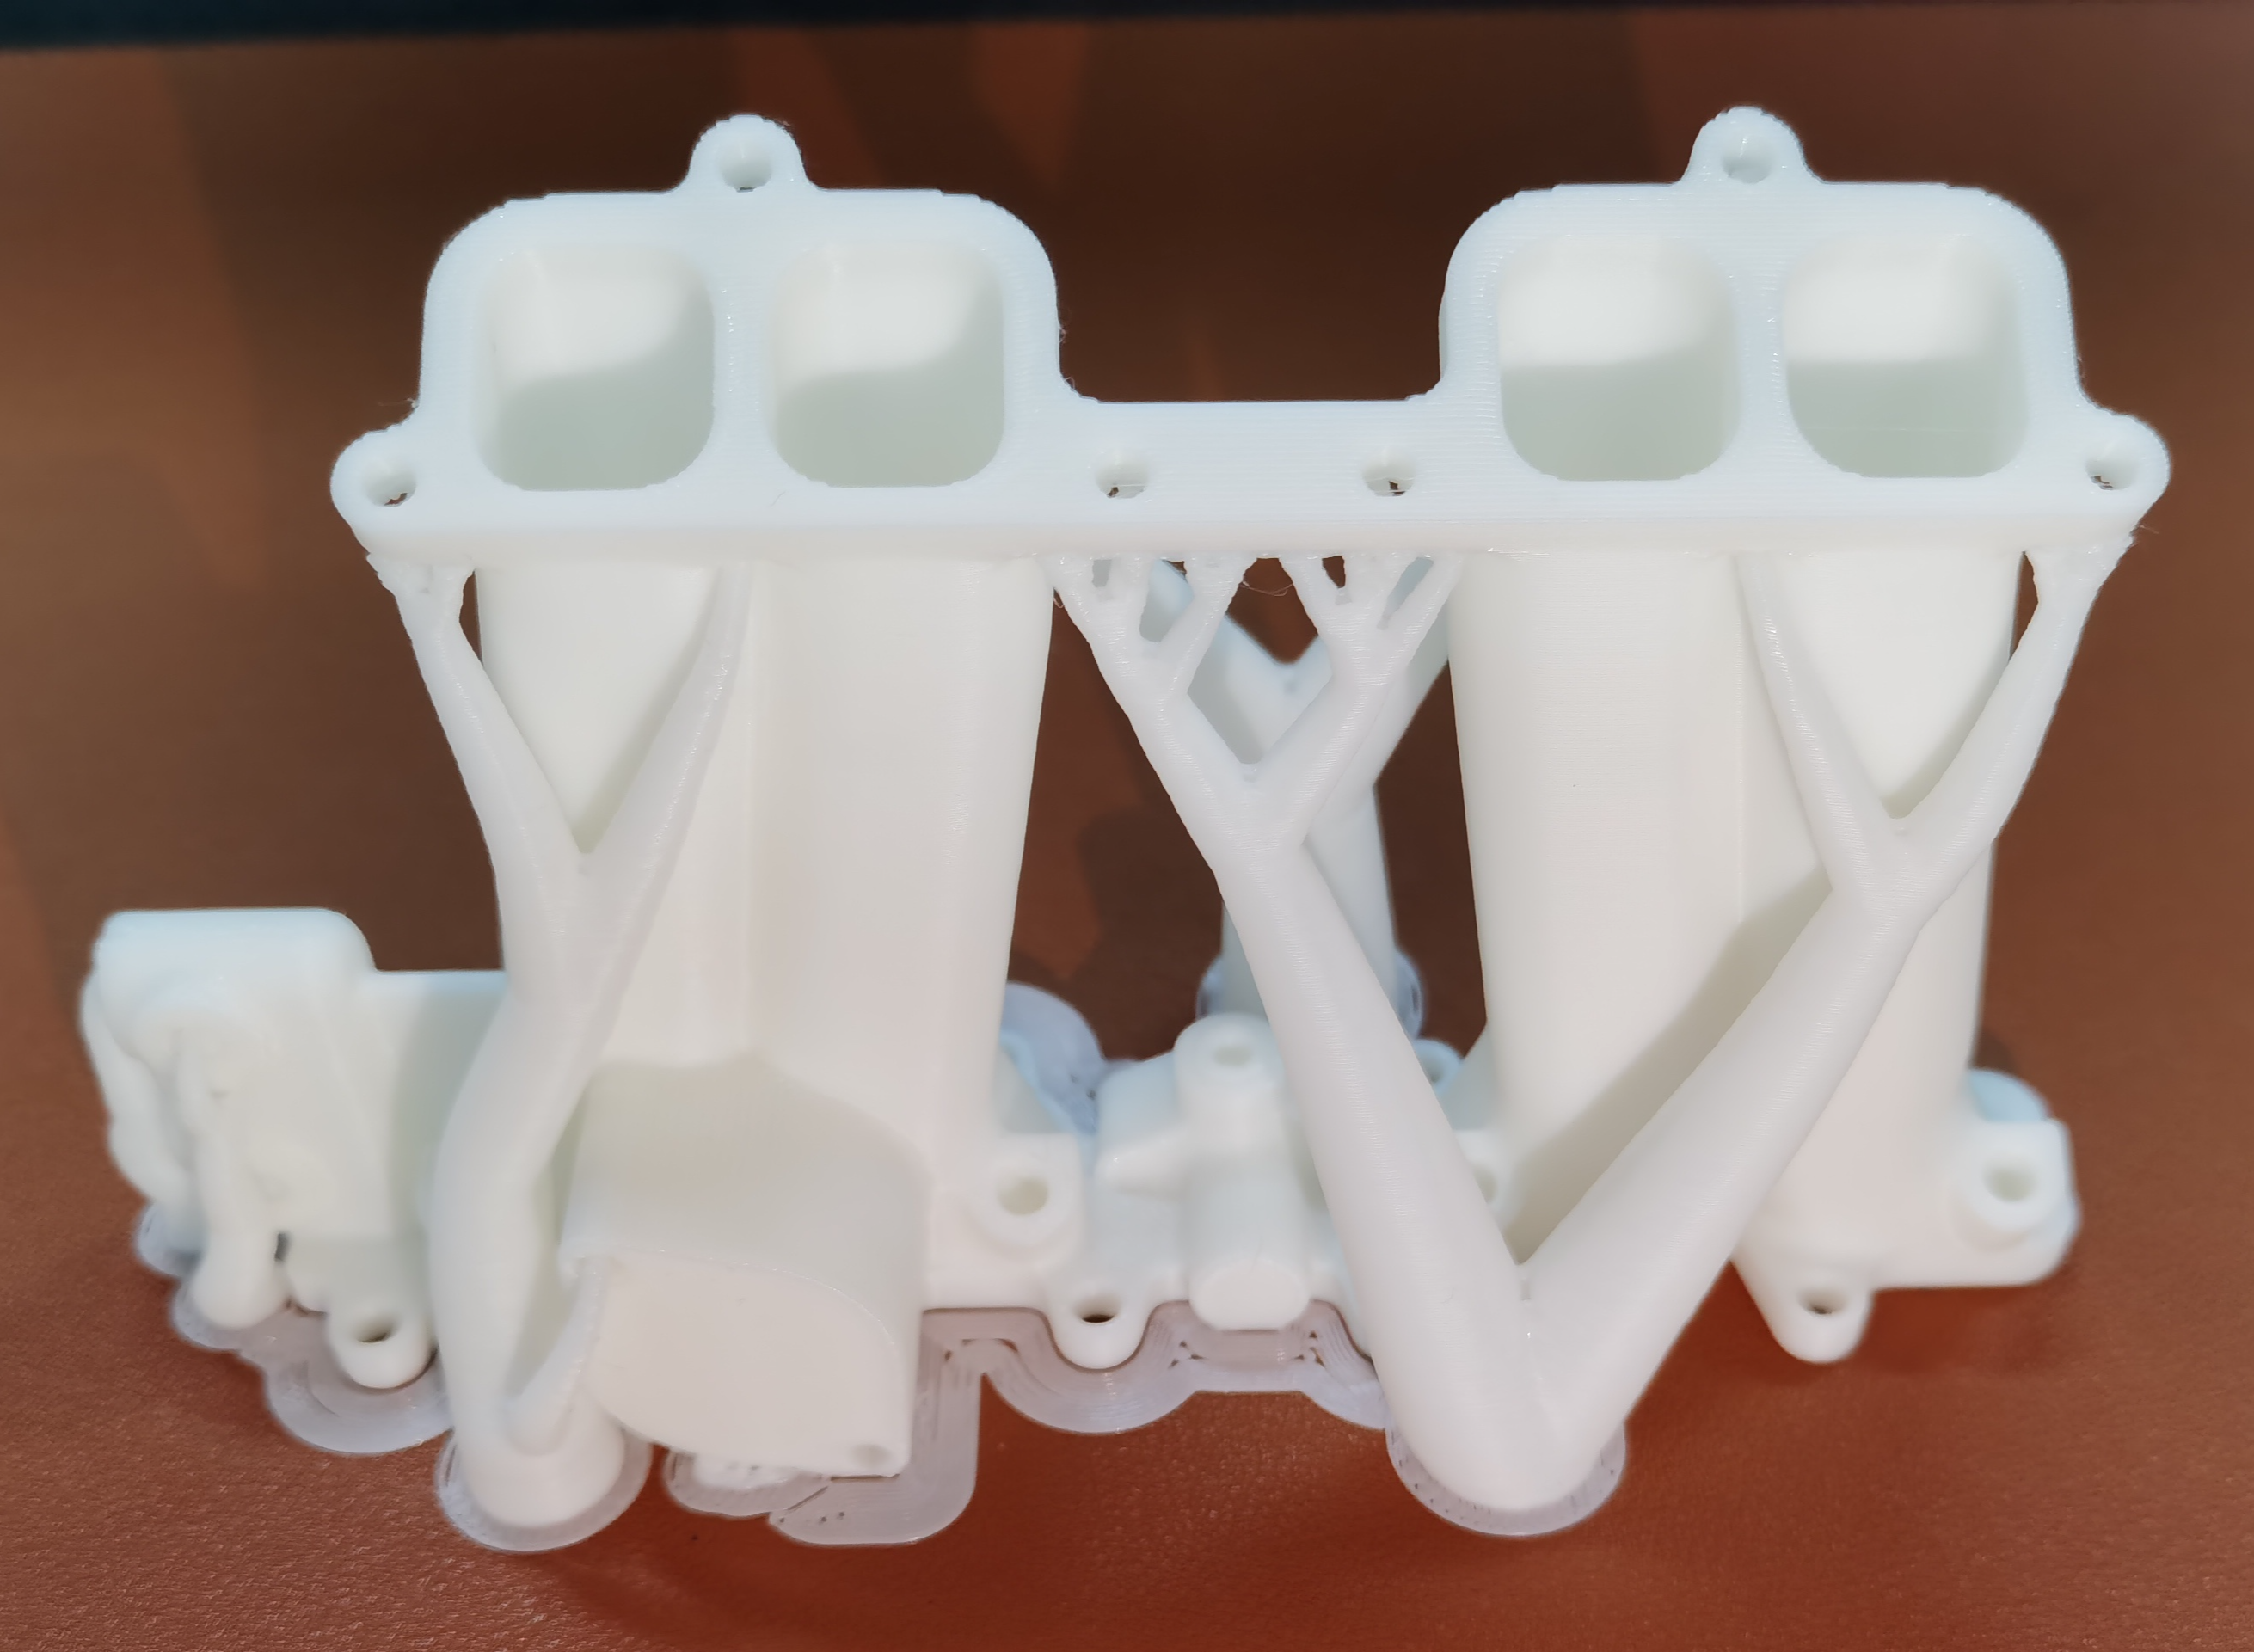
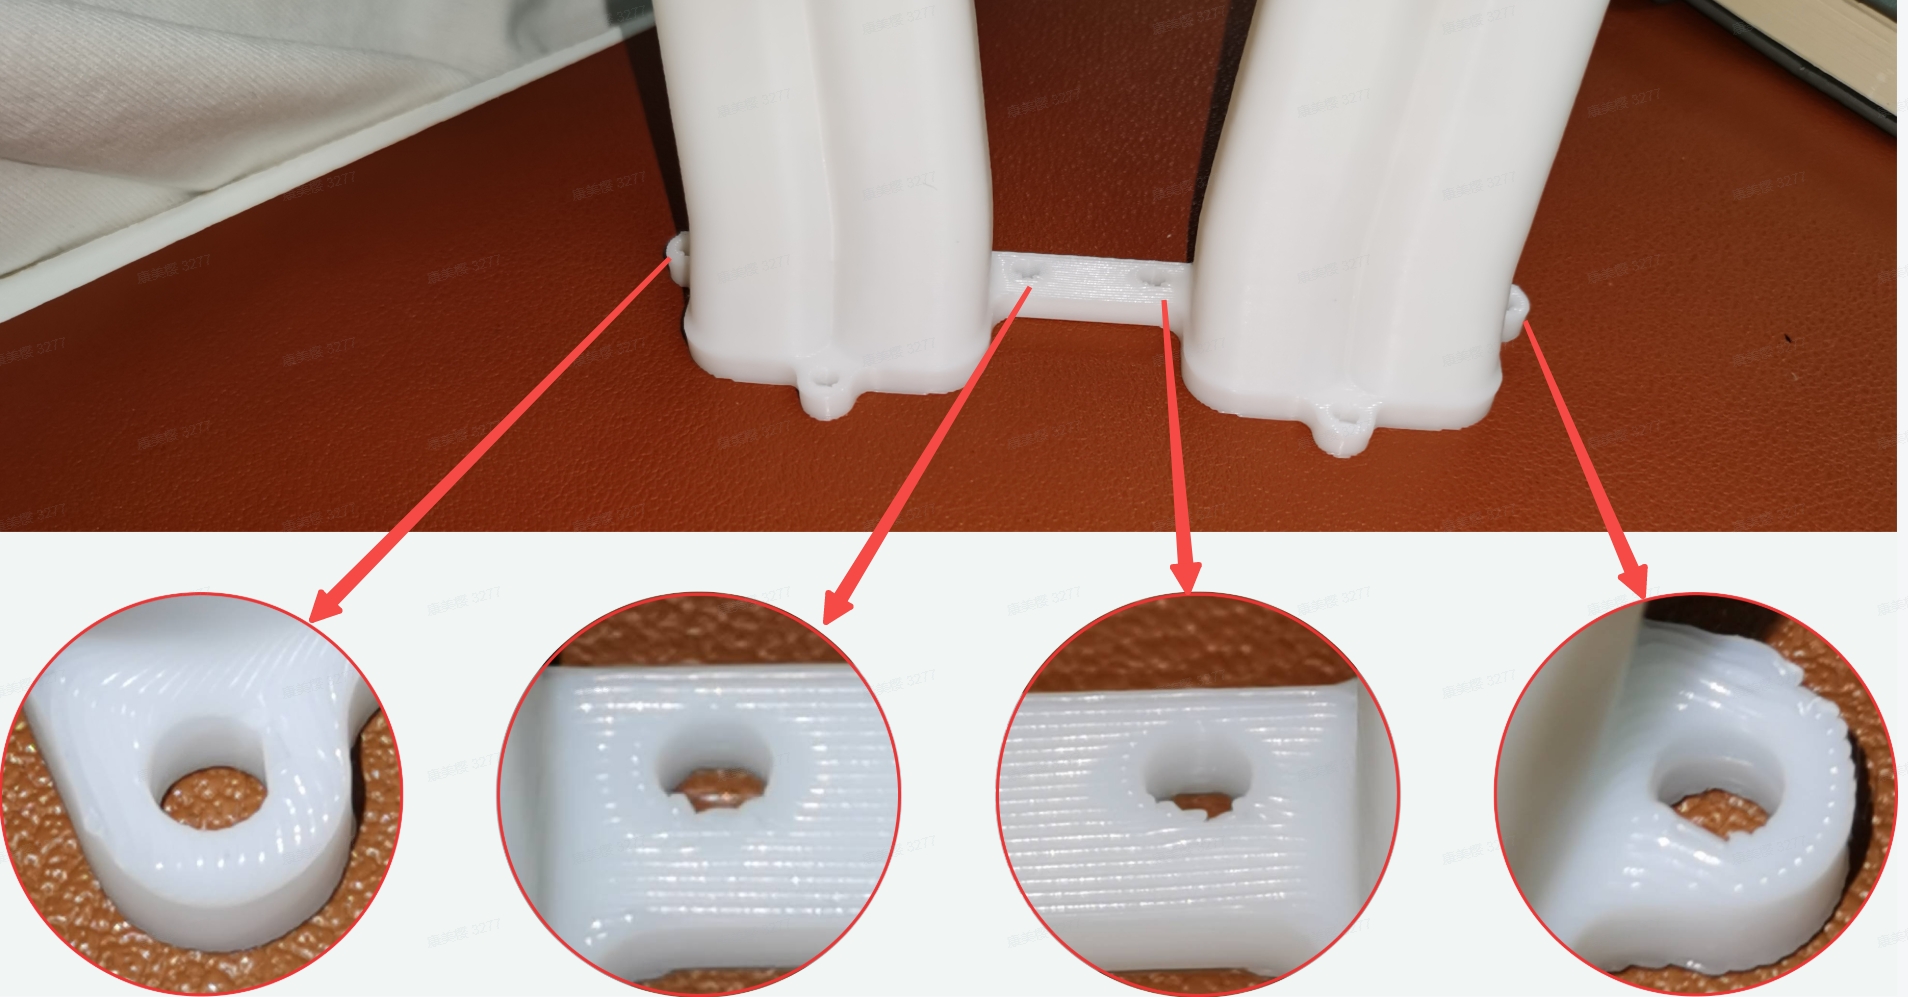
(5.0-Supporting Results and Print Quality)
1)Model Import
• Users can easily import a variety of common 3D model file formats, such as STL, OBJ, and 3mf, preparing for subsequent operations.
2)Model Coloring
• Intuitive model coloring tools are provided, allowing users to assign required filament colors to different parts or surfaces.
3)Preview
• The software provides real-time 3D preview functionality, enabling users to clearly view the color distribution and structure of each layer before printing, ensuring satisfactory print results.
4)Slicing File Export
• The software supports converting colored models into slice files, generating G-codes for multi-color printing, thereby preparing the final steps for print preparation.
5)Local Area Network for Software to Filament Mapping
• Through a local area network connection, the software can easily communicate with a multi-color printer and map materials, thereby enabling remote operation and monitoring of the print process.
6)Controlling the printer to start printing
• Users can directly control the multi-color printer through the software interface, initiate the print job, monitor the print process, and adjust and intervene as needed.
The series of functionalities greatly simplifies and optimizes the workflow of FDM multi-color printing, helping users more effortlessly realize intricate multi-color print works.
We are continuously researching and optimizing parameter settings to better adapt to different printer types and printing scenarios, consistently providing more efficient and suitable printing solutions.
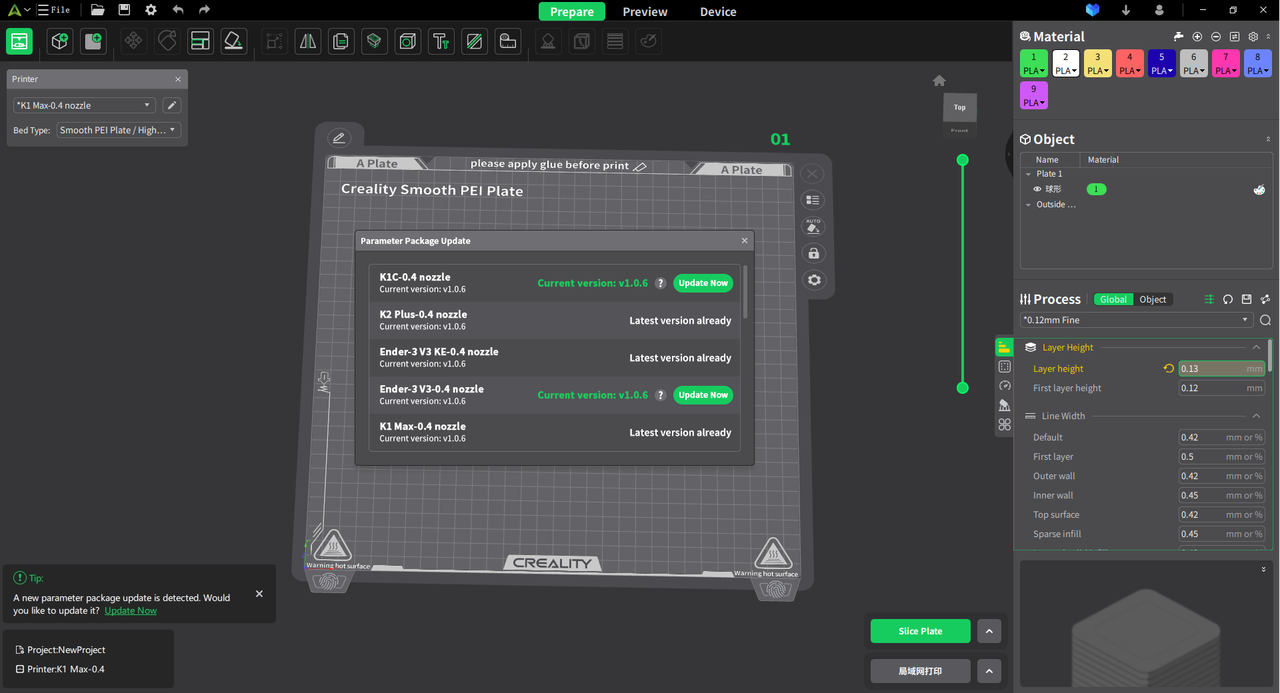
Previously, users needed to update the slice to obtain new configurations, which was rather cumbersome. But now, we have enhanced the parameter synchronization method - with just one click, users can complete updates. As long as you are connected to the internet, we will instantly push the latest configurations to better assist you in completing printing tasks.
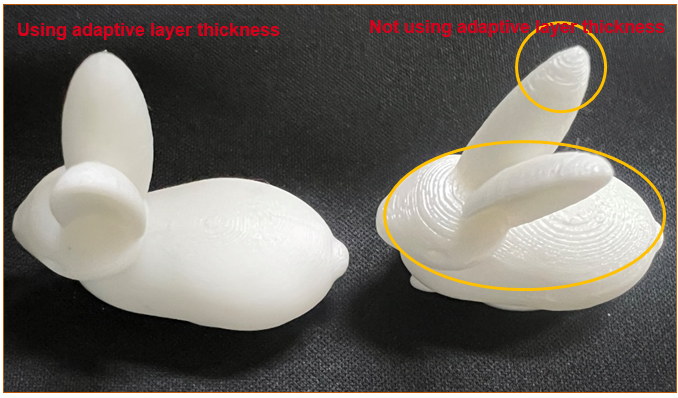
We have also launched the feature of adaptive layer height slicing. You might wonder why this feature is necessary. As you can see from the picture on the right, models printed with adaptive layer height slicing are of a higher quality than those produced with uniform layer heights. This method reduces layer lines, achieves finer detail handling, and also saves time.
Adaptive layer height slicing devises a layer height strategy based on the model's geometry, employing thinner layers for detailed areas and thicker layers for smoother regions. This approach enhances quality while also reducing printing time.
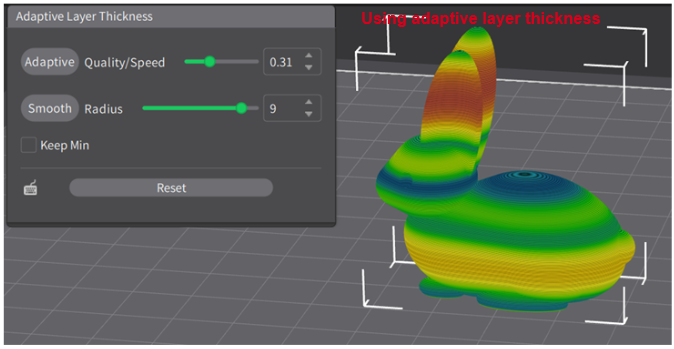
PS:Each color on the model means a different layer height.
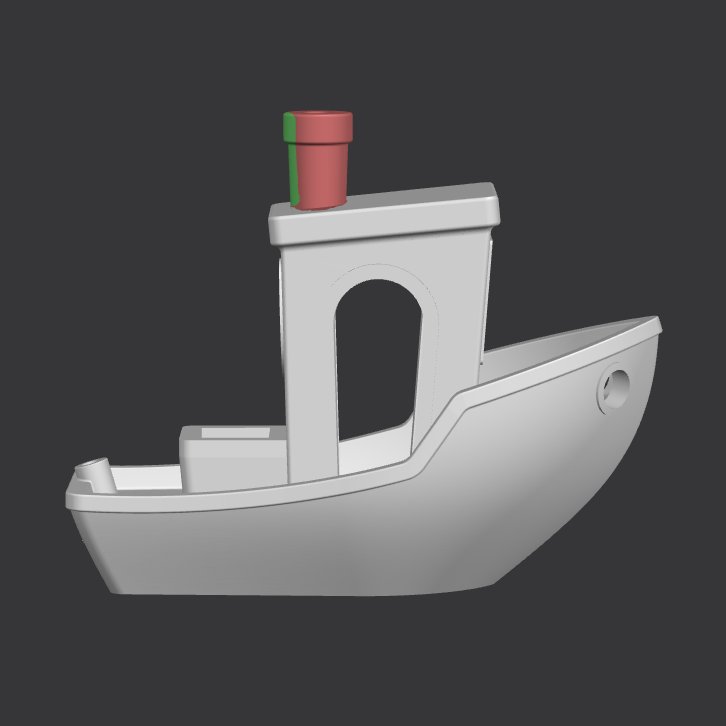
The newly introduced manual support feature in Version 5.0 facilitates the addition and blocking of support positions using three methods--a paintbrush, fill, or gap fill. You can leverage the manual support feature to make specific adjustments when automatic support doesn't yield the desired results.

PS:The green color represents the position of the generated support while the red color indicates the position of blocked-off supports.
With the newly introduced Z-Seam painting feature, you now have the freedom to modify the Z-seam positions, enabling you to adjust the surface effect according to the model's requirements.
Before
Seam Painting
After
Beyond feature enhancements, version 5.0 also fixes several issues of interest to users, highlighted below:
• Generative support algorithm optimized to ensure print quality while reducing the automated support generation area.
• The fill algorithm is honed to rectify anomalies under specific scenarios.
• The auto layout algorithm improved to solve model auto-flip issues and layout outside the plate problem.
• Slicing performance enhanced, amplifying slicing efficiency for massive or multiple model slicing to shorten the slicing time.
• Function added for choosing the path for model downloads, resolving the issue of memory usage in the C drive.
• A shortcut key is added to the operation bar.
• Skirt parameters amended to solve difficulty in removing the skirt.
• Added a feature for space + left click platform drag to solve the Magic Mouse platform dragging issue.
• Fixed a bug where the nozzle path dynamic view skipped the first layer and jumped directly to the second.
• Rectified bug related to auto layout not automatically avoiding multiple objects when printing in order.
• A print preview issue resulting in the non-display of estimated consumption weight has been addressed.
• Bug resolved, where slicing a single-line print configuration could cause a crash.
• Fixed an anomaly in the traversing path in hollow areas after support activation.
• An established issue fixed where an interval parameter setting in slicing would not function correctly.
• LAN device details page file list fix allows deletion of listed file.
• Rectified bug where you don't stop slicing after clicking the prompt, "Add support."
• A bug causing screen flash when clicking undo in specific scenarios has been corrected.
• The hitch where filling is generated where the model has been shelled has been fixed.
• The inability to engrave after pressing the delete key to cancel the engraving box bug was remedied.
• Fixed the bug where the shell-removed area of the model was being cured and also created a patch.
• A bug fixed where layer values were not displayed when moving the control layer slider.
• Fixed program crashes when the set angle value for overhang exceeds the limit bug.
• Z-axis inconsistency post model rotation issue solved.
• Solved the problem of low sensitivity while right-click rotary platform with the mouse.
• Anomalies resolved associated with lining in overhang printing.
• The disappearing print platform bug resolved.
• Fixed a bug where a model doesn't inherit original data after rotation and invoke undo clone/copy.
• Rectified page flash issue when importing large models.
• Strange font usage on UI is fixed.
• Other known issues have been addressed.
Download link for Creality Print version 5.0:
Currently, Creality Print 5.0 is compatible with the following models: K1, K1C, K1Max, Ender-3 V3, Ender-3 V3 KE, Ender-3 V3 SE and Ender-3 S1. We are actively working to enhance compatibility with more models, so stay tuned for more updates.
For users of the K1 Max, please ensure to update your machine's firmware to version [1.3.3.26]or higher to maximize the software experience.
We're making progress toward guaranteeing firmware compatibility for the K1,K1C,Ender V3 KE and Ender3 V3 units. The updated firmware is anticipated to be out in May, so please keep an eye out for update announcements.
Here's the firmware download link: https://www.crealitycloud.cn/software-firmware/firmware/flagship-series.